في هذا القسم، سنقوم بإنشاء تطبيق RESTful صغير باستخدام Spring Boot. سيقوم تطبيقنا بتنفيذ عمليات CRUD (الإنشاء والقراءة والتحديث والحذف) على العملاء من المثال الموجود في الجزء السابق
من النظرة العامة. للبدء، سنقوم بإنشاء تطبيق Spring Boot جديد من خلال القائمة: ملف -> جديد -> مشروع... في النافذة التي تفتح، حدد Spring Initializr وحدد Project SDK: انقر فوق الزر "التالي". في النافذة التالية، حدد "Maven Project" كنوع المشروع، وحدد "المجموعة" و"القطعة الأثرية": انقر فوق الزر "التالي". في النافذة التالية، نحتاج إلى تحديد مكونات Spring Framework اللازمة للمشروع. سيكون Spring Web كافيًا بالنسبة لنا: انقر فوق الزر "التالي". الآن كل ما تبقى هو الإشارة إلى اسم المشروع وموقعه في نظام الملفات: انقر فوق الزر "إنهاء". تم إنشاء المشروع، والآن يمكننا رؤية هيكله: قامت IDEA بإنشاء واصف نشر Maven (pom.xml) والفئة الرئيسية للتطبيق ( RestExampleApplication) لنا. وهنا ما تبدو عليه:
pom.xml:<?xml version="1.0" encoding="UTF-8"?><project xmlns="http://maven.apache.org/POM/4.0.0" xmlns:xsi="http://www.w3.org/2001/XMLSchema-instance"
xsi:schemaLocation="http://maven.apache.org/POM/4.0.0 https://maven.apache.org/xsd/maven-4.0.0.xsd"><modelVersion>4.0.0</modelVersion><parent><groupId>org.springframework.boot</groupId><artifactId>spring-boot-starter-parent</artifactId><version>2.2.2.RELEASE</version><relativePath/><!-- lookup parent from repository --></parent><groupId>com.codegym.lessons/groupId><artifactId>rest_example</artifactId><version>0.0.1-SNAPSHOT</version><name>rest_example</name><description>REST example project</description><properties><java.version>1.8</java.version></properties><dependencies><dependency><groupId>org.springframework.boot</groupId><artifactId>spring-boot-starter-web</artifactId></dependency><dependency><groupId>org.springframework.boot</groupId><artifactId>spring-boot-starter-test</artifactId><scope>test</scope><exclusions><exclusion><groupId>org.junit.vintage</groupId><artifactId>junit-vintage-engine</artifactId></exclusion></exclusions></dependency></dependencies><build><plugins><plugin><groupId>org.springframework.boot</groupId><artifactId>spring-boot-maven-plugin</artifactId></plugin></plugins></build></project>
تطبيقنا هو نظام إدارة العملاء. لذا، أول شيء يتعين علينا القيام به هو إنشاء كيان العميل. ستكون فئة POJO (كائن Java القديم العادي). إنشاء modelحزمة داخل com.codegym.lessons.rest_exampleالحزمة. داخل modelالحزمة، قم بإنشاء Customer:
ستقوم الخدمة بتنفيذ عمليات CRUD على العملاء. والخطوة التالية هي إنشاء خدمة من شأنها تنفيذ هذه العمليات. في com.codegym.lessons.rest_exampleالحزمة، قم بإنشاء serviceحزمة. وداخل ذلك، قم بإنشاء CustomerServiceواجهة. إليك رمز الواجهة مع التعليقات:
publicinterfaceCustomerService{/**
* Creates a new customer
* @param customer - Customer to be created
*/voidcreate(Customer customer);/**
* Returns a list of all existing customers
* @return List of customers
*/List<Customer>readAll();/**
* Returns a customer based on its ID
* @param id - Customer ID
* @return - Customer object with the given ID
*/Customerread(int id);/**
* Updates the customer with the given ID,
* according to the passed customer
* @param customer - Customer to use to update the data
* @param id - ID of the customer you want to update
* @return - true if the data has been updated, otherwise false
*/booleanupdate(Customer customer,int id);/**
* Deletes the customer with the given ID
* @param id - ID of the customer to be deleted
* @return - true if the customer was deleted, otherwise false
*/booleandelete(int id);}
بعد ذلك، نحن بحاجة إلى تنفيذ هذه الواجهة. الآن سوف Map<Integer, Customer>نقوم بتخزين عملائنا. ستكون مفاتيح الخريطة هي معرفات العملاء، وستكون القيم هي العملاء أنفسهم. يتم ذلك حتى لا يتم تحميل هذا المثال بتفاصيل العمل مع قاعدة بيانات حقيقية. ومع ذلك، في المستقبل سنكون قادرين على كتابة تطبيق آخر للواجهة، مما سيجعل من الممكن الاتصال بقاعدة بيانات حقيقية. في serviceالحزمة، قم بإنشاء تطبيق للواجهة CustomerService:
يخبرنا التعليق @Serviceالتوضيحي سبرينغ أن هذه الفئة عبارة عن خدمة. هذا نوع خاص من الفئات ينفذ بعض منطق تطبيقات الأعمال. بعد ذلك، وبفضل هذا التعليق التوضيحي، سيستخدم Spring حقن التبعية لتزويدنا بمثيل لهذه الفئة في جميع الأماكن التي نحتاج إليها. الآن حان الوقت لإنشاء وحدة تحكم. هذه فئة خاصة حيث سنقوم بتنفيذ منطق معالجة طلبات العميل المرسلة إلى نقاط النهاية (URIs). لجعل كل هذا أكثر وضوحا، سنقوم بإنشاء هذا الفصل بشكل تدريجي. أولاً، قم بإنشاء الفصل نفسه وأضف التبعية إلى CustomerService:
دعونا نشرح التعليقات التوضيحية: @RestController يخبر Spring أن هذه الفئة عبارة عن وحدة تحكم REST. بمعنى آخر، تطبق هذه الفئة منطق معالجة طلبات العميل. يخبر @Autowired Spring أنه يجب إضافة التبعية هنا. نمرر CustomerServiceالواجهة إلى المنشئ. في وقت سابق، قمنا بتمييز تنفيذ هذه الخدمة بالتعليق التوضيحي @Service، والآن سيتمكن Spring من تمرير مثيل لهذا التنفيذ إلى مُنشئ وحدة التحكم. بعد ذلك، سوف نقوم بتنفيذ كل طريقة تحكم للتعامل مع عمليات CRUD. لنبدأ بعملية الإنشاء. للقيام بذلك نكتب createالطريقة:
دعنا نحلل هذه الطريقة: @PostMapping(value = "/customers")يعني أن هذه الطريقة تعالج طلبات POST المرسلة إلى العنوان "/customers". تقوم الطريقة بإرجاع ملف ResponseEntity<?>. A ResponseEntityهي فئة خاصة لإرجاع الاستجابات. وسنستخدمه لاحقًا لإرجاع رمز حالة HTTP إلى العميل. الطريقة لديها @RequestBody Customer customerمعلمة. تأتي قيمة هذه المعلمة من نص الطلب. والتعليق @RequestBodyيدل على ذلك. داخل نص الطريقة، نستدعي الطريقة create()على الخدمة التي تم إنشاؤها مسبقًا ونمررها إلى وحدة تحكم العميل التي تتلقاها في المعلمات. ثم نعيد الحالة "تم الإنشاء 201" عن طريق إنشاء ResponseEntityكائن جديد وتمرير HttpStatusحقل التعداد المقابل إليه. بعد ذلك، سنقوم بتنفيذ readالعملية: أولاً، سنقوم بتنفيذ العملية للحصول على قائمة بجميع العملاء المتاحين:
دعونا نتعمق في: @GetMapping(value = "/customers")— كل شيء هنا مشابه للتعليق @PostMappingالتوضيحي، ولكننا الآن نقوم بمعالجة طلبات GET. هذه المرة نعيد ResponseEntity<List<Customer>>، وبالإضافة إلى حالة HTTP، سنعيد أيضًا نص الاستجابة، والذي سيكون قائمة العملاء. في وحدات تحكم Spring's REST، كل شيء عبارة عن كائنات POJO ومجموعات من كائنات POJO، والتي يتم إرجاعها كأجسام استجابة وتسلسلها تلقائيًا إلى JSON، ما لم ينص على خلاف ذلك. وهذا يناسبنا تماما. داخل الطريقة، نستخدم خدمتنا للحصول على قائمة بجميع العملاء. بعد ذلك، إذا لم تكن القائمة فارغة وليست فارغة، فإننا نستخدم الفئة ResponseEntityلإرجاع قائمة العملاء ورمز حالة HTTP "200 OK". وبخلاف ذلك، فإننا ببساطة نعيد رمز حالة HTTP "404 Not Found". سنقوم الآن بتنفيذ القدرة على الحصول على عميل باستخدام معرفه:
شيء واحد جديد هنا هو متغير المسار. يتم تعريف المتغير في URI: value = "/customers/{id}". ونشير إليه بالأقواس المتعرجة. ونستقبلها كمعلمة intطريقة باستخدام @PathVariable(name = "id")التعليق التوضيحي. ستقبل هذه الطريقة الطلبات المرسلة إلى معرفات URI في النموذج /customers/{id}، حيث {id}يمثل أي قيمة رقمية. يتم بعد ذلك تمرير هذه القيمة عبر int idالمتغير إلى معلمة الطريقة. في الجسم، نحصل على Customerالكائن باستخدام خدمتنا والمستلمة id. وبعد ذلك، قياسًا على القائمة، نعيد إما الحالة "200 OK" والكائن Customerنفسه، أو ببساطة الحالة "404 Not Found" إذا لم يكن لدى النظام عميل لديه ذلك id. ما زلنا بحاجة إلى تنفيذ عمليتين: التحديث والحذف. إليك الكود الخاص بهذه الطرق:
لا يوجد شيء جديد بشكل أساسي في هذه الأساليب، لذلك سنتخطى الوصف التفصيلي. الشيء الوحيد الجدير بالذكر هو أن update()الطريقة تتعامل مع طلبات PUT ( @PutMappingالتعليق التوضيحي)، delete()وتتعامل الطريقة مع طلبات الحذف ( DeleteMappingالتعليق التوضيحي). إليك الكود الكامل لوحدة التحكم:
لبدء تطبيقنا، فقط قم بتشغيل main()الطريقة في RestExampleApplicationالفصل. ولكن لاختبار خدمات الويب RESTful، نحتاج إلى تنزيل برامج إضافية. الحقيقة هي أن طلبات GET من السهل جدًا إرسالها من متصفح عادي، لكن المتصفح العادي لا يمكنه إرسال طلبات POST وPUT وDELETE. لا تقلق: يمكنك استخدام برنامج يسمى Postman لإرسال أي طلبات HTTP. يمكنك تحميله من هنا
. بعد تنزيل Postman وتثبيته، نبدأ في اختبار تطبيقنا. للقيام بذلك، افتح البرنامج وأنشئ طلبًا جديدًا: انقر فوق الزر "جديد" في الزاوية اليسرى العليا. بعد ذلك، حدد "طلب": بعد ذلك، أعطه اسمًا واحفظه. لنحاول الآن إرسال طلب POST إلى الخادم وإنشاء العميل الأول: نقوم بإنشاء العديد من العملاء بهذه الطريقة. ثم نقوم بتغيير نوع الطلب إلى GET وإرسال الطلب إلى الخادم:
ملخص
تهانينا! لقد قمنا بتغطية REST بما فيه الكفاية. كان هناك كمية كبيرة من المواد، ولكن نأمل أن تكون مفيدة لك:
لقد تعلمنا ما هو REST.
لقد تعلمنا كيف ظهرت REST إلى الوجود.
تحدثنا عن القيود والمبادئ الكامنة وراء هذا النمط المعماري:
بنية خادم العميل
عديمي الجنسية
التخزين المؤقت
واجهة موحدة
طبقات
الرمز عند الطلب (اختياري)
لقد استكشفنا الفوائد التي تقدمها REST
لقد درسنا بالتفصيل كيفية تفاعل الخادم والعميل مع بعضهما البعض عبر بروتوكول HTTP.
لقد ألقينا نظرة فاحصة على الطلبات والاستجابات. قمنا بتشريح الأجزاء المكونة لها.
أخيرًا، حصلنا على بعض الخبرة العملية من خلال كتابة تطبيق RESTful الصغير الخاص بنا باستخدام Spring Boot. وتعلمنا أيضًا كيفية اختباره باستخدام Postman.
أوف. لقد كان ذلك كثيرًا، ولكن لا يزال هناك شيء عليك القيام به كواجب منزلي.
العمل في المنزل
حاول القيام بما يلي:
باتباع الوصف أعلاه، قم بإنشاء مشروع Spring Boot الخاص بك وقم بتنفيذ نفس المنطق كما في الدرس. كرر كل شيء بالضبط.
بدء تطبيق.
قم بتنزيل وتكوين Postman (أو أي أداة أخرى لإرسال الطلبات، على سبيل المثال، Curl).
اختبر طلبات POST وGET بنفس الطريقة الموضحة في الدرس.

 انقر فوق الزر "التالي". في النافذة التالية، حدد "Maven Project" كنوع المشروع، وحدد "المجموعة" و"القطعة الأثرية":
  انقر فوق الزر "التالي". في النافذة التالية، نحتاج إلى تحديد مكونات Spring Framework اللازمة للمشروع. سيكون Spring Web كافيًا بالنسبة لنا:
  انقر فوق الزر "التالي". الآن كل ما تبقى هو الإشارة إلى اسم المشروع وموقعه في نظام الملفات:
  انقر فوق الزر "إنهاء". تم إنشاء المشروع، والآن يمكننا رؤية هيكله:
  قامت IDEA بإنشاء واصف نشر Maven (pom.xml) والفئة الرئيسية للتطبيق (


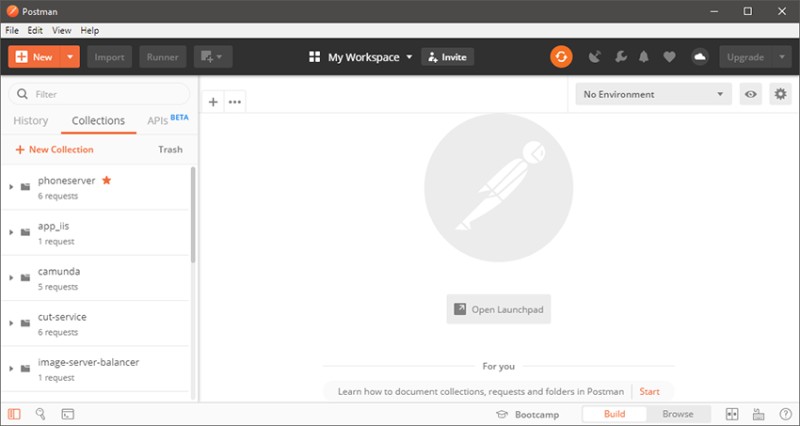 انقر فوق الزر "جديد" في الزاوية اليسرى العليا. بعد ذلك، حدد "طلب":
  بعد ذلك، أعطه اسمًا واحفظه. لنحاول الآن إرسال طلب POST إلى الخادم وإنشاء العميل الأول:
  نقوم بإنشاء العديد من العملاء بهذه الطريقة. ثم نقوم بتغيير نوع الطلب إلى GET وإرسال الطلب إلى الخادم:
GO TO FULL VERSION