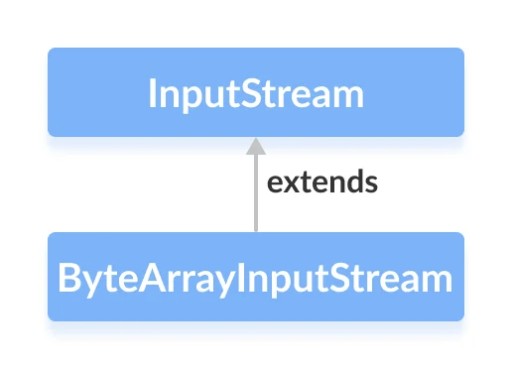
java.io 패키지 의 ByteArrayInputStream 클래스를 사용 하여 입력 배열(바이트)을 읽을 수 있습니다.
바이트 배열 입력 스트림을 생성하려면 먼저 java.io.ByteArrayInputStream 패키지를 가져와야 합니다 . 패키지를 가져온 후 입력 스트림을 만드는 데 사용할 수 있는 두 개의 생성자가 있습니다.
ByteArrayInputStream input = new ByteArrayInputStream(arr);
ByteArrayInputStream input = new ByteArrayInputStream(arr, 2, 2);
클래스 내부에는 4개의 필드가 있습니다.
// Byte array provided by the creator of the stream
protected byte buf[];

// Index of the next character to read from the input stream's buffer
protected int pos;

// Current marked position in the stream
protected int mark = 0;

// Index is one greater than the last valid character in the input stream's buffer
protected int count;
다음은 생성자입니다.
public ByteArrayInputStream(byte buf[]) {
    this.buf = buf;
    this.pos = 0;
    this.count = buf.length;
}

public ByteArrayInputStream(byte buf[], int offset, int length) {
    this.buf = buf;
    this.pos = offset;
    this.count = Math.min(offset + length, buf.length);
    this.mark = offset;
}
ByteArrayInputStream 클래스의 메서드
| 방법 | 행동 |
|---|---|
| 정수 읽기() | 이 입력 스트림에서 데이터의 다음 바이트를 읽습니다. |
| int 읽기(바이트 b[], int 꺼짐, int len) | 입력 스트림에서 여러 바이트를 읽고 버퍼 배열 b 에 저장합니다 . off 는 대상 배열 b 에 대한 오프셋입니다 . len 은 읽을 최대 바이트 수입니다. |
| 긴 스킵(긴 n) | 이 입력 스트림에서 n 바이트의 입력을 건너뜁니다. 건너뛴 바이트 수를 반환합니다(입력 스트림의 끝에 도달하면 n보다 작을 수 있음). |
| 사용 가능한 정수() | 이 입력 스트림에서 읽을 수 있는(또는 건너뛸 수 있는) 남은 바이트 수를 반환합니다. |
| 무효 리셋() | 버퍼를 표시된 위치로 재설정합니다. 다른 위치가 표시되거나 생성자에 다른 오프셋이 지정되지 않는 한 표시된 위치는 0입니다. |
| 불리언 마크Supported() | 이 InputStream 이 표시/재설정을 지원하는지 여부를 확인합니다. ByteArrayInputStream 에 대해 true를 반환합니다 . |
| 무효 닫기() | 아무것도 하지 않습니다. |
| 무효 표시(int readAheadLimit) | 설정표시현재 위치와 같은 필드. reset 메소드가 호출 되면 이후 읽기는 해당 위치에서 시작됩니다. readAheadLimit 매개변수는 사용되지 않으며 메서드의 동작에 영향을 주지 않습니다 . |

이러한 방법을 자세히 살펴보고 실제로 어떻게 작동하는지 살펴보겠습니다.
읽다()
일반 InputStream 에서처럼 ByteArrayInputStream 에서 바이트를 읽으려면 read() 메서드를 사용할 수 있습니다 .
public static void main(String[] args) {
   byte[] array = {1, 2, 3, 4};

   try (ByteArrayInputStream input = new ByteArrayInputStream(array)) {
       for (int i = 0; i < array.length; i++) {
           int data = input.read();
           System.out.print(data + ", ");
       }
   } catch (IOException e) {
       e.printStackTrace();
   }
}
사용 가능()
버퍼에 무언가가 있는지 확인하려면 available() 메서드를 호출하면 됩니다.
public static void main(String[] args) {
   byte[] array = {1, 2, 3, 4};

   try (ByteArrayInputStream input = new ByteArrayInputStream(array)) {
       System.out.println("Bytes available for reading: " + input.available());

       input.read();
       System.out.println("Bytes available for reading " + input.available());

       input.read();
       System.out.println("Bytes available for reading " + input.available());
   } catch (IOException e) {
       e.printStackTrace();
   }
}
버퍼에서 읽을 때마다 읽기에 사용할 수 있는 바이트 수가 변경되는 것을 볼 수 있습니다.
산출:
읽기 가능 바이트: 3
읽기 가능 바이트: 2
스킵(긴 n)
skip() 메서드를 사용하여 특정 바이트 수를 건너뛰고 읽지 않을 수 있습니다.
public static void main(String[] args) {
   byte[] array = {1, 2, 3, 4};

   try (ByteArrayInputStream input = new ByteArrayInputStream(array)) {
       input.skip(2);

       while (input.available() != 0) {
           int data = input.read();
           System.out.print(data + ", ");
       }
   } catch (IOException e) {
       e.printStackTrace();
   }
}
산출:
초기화()
이 메서드는 버퍼링된 스트림의 위치를 마지막으로 표시된 위치로 재설정합니다. 다른 마크를 설정하지 않는 한 위치 0입니다.
public static void main(String[] args) {
   byte[] buf = {65, 66, 67, 68, 69};
   try (ByteArrayInputStream input = new ByteArrayInputStream(buf)) {
       System.out.println("Read: " + input.read());
       System.out.println("Read: " + input.read());
       System.out.println("Read: " + input.read());
       System.out.println("Read: " + input.read());

       System.out.println("Calling reset() method");
       input.reset();
       System.out.println("Read: " + input.read());
       System.out.println("Read: " + input.read());
   } catch (IOException e) {
       e.printStackTrace();
   }
}
reset() 메서드를 호출하면 스트림의 시작점으로 이동하는 것을 볼 수 있습니다 .
산출:
읽기: 66
읽기: 67
읽기: 68
reset() 메서드 호출
읽기: 65
읽기: 66
마크(int readAheadLimit)
ByteArrayInputStream 클래스의 mark () 메서드는 현재 바이트 위치, 즉 이전에 읽은 바이트 바로 뒤에 내부 표시를 설정합니다. 이 메서드는 스트림이 유효하지 않게 되기 전에 표시 이후에 읽을 수 있는 바이트 수를 나타내는 매개 변수를 사용합니다. 기본적으로 표시가 명시적으로 설정되지 않은 경우 ByteArrayInputStream 은 위치 0 또는 생성자에 전달된 오프셋 위치를 표시합니다. readAheadLimit 표시는 이 클래스와 관련이 없다는 점에 유의해야 합니다 .
/* Note: For this class, {@code readAheadLimit}
*  has no meaning.
*
* @since   1.1
*/
public void mark(int readAheadLimit) {
   mark = pos;
}
다음은 mark() 및 reset() 메서드를 사용하여 ByteArrayInputStream 에서 표시를 설정하는 예입니다 . 이전 예제에 mark() 메서드 에 대한 호출을 추가합니다 .
public static void main(String[] args) {
   byte[] buf = {65, 66, 67, 68, 69};
   try (ByteArrayInputStream input = new ByteArrayInputStream(buf)) {
       System.out.println("Read: " + input.read());
       System.out.println("Read: " + input.read());
       System.out.println("Read: " + input.read());
       input.mark(5);

       System.out.println("Read: " + input.read());
       System.out.println("Read: " + input.read());

       System.out.println("Calling reset() method");
       input.reset();

       System.out.println("Read: " + input.read());
       System.out.println("Read: " + input.read());

   } catch (IOException e) {
       e.printStackTrace();
   }
}
현재 스트림의 위치가 변경된 것을 볼 수 있습니다.
산출:
읽기: 66
읽기: 67
읽기: 68
읽기: 69
reset() 메서드 호출
읽기: 68
읽기: 69
마크지원됨()
markSupported () 메서드를 사용하면 마크를 설정할 수 있는지 여부를 확인할 수 있습니다. 반환 값의 출처를 이해하기 위해 메서드 코드로 이동해 보겠습니다.
/**
* Tests if this {@code InputStream} supports mark/reset. The
* {@code markSupported} method of {@code ByteArrayInputStream}
* always returns {@code true}.
*
* @since   1.1
*/
public boolean markSupported() {
   return true;
}
메서드는 항상 true 를 반환합니다 . 이것을 실제로 테스트해 봅시다.
public static void main(String[] args) {
   byte[] buf = {65, 66, 67, 68, 69};
   try (ByteArrayInputStream bais = new ByteArrayInputStream(buf)) {
       boolean isMarkSupported = bais.markSupported();

       System.out.println("isMarkSupported: " + isMarkSupported);
       System.out.println("Read: " + bais.read());
       System.out.println("Read: " + bais.read());

       bais.mark(1);
       System.out.println("Read: " + bais.read());
       isMarkSupported = bais.markSupported();
       System.out.println("isMarkSupported: " + isMarkSupported);

       bais.reset();
       isMarkSupported = bais.markSupported();
       System.out.println("isMarkSupported: " + isMarkSupported);
   } catch (IOException e) {
       e.printStackTrace();
   }
}
mark() 및 reset() 메서드를 실행한 후 스트림은 항상 준비 상태가 되며 표시를 지원합니다.
산출:
읽기: 65
읽기: 66
읽기: 67
isMarkSupported: 참
isMarkSupported: 참
닫다()
그리고 close 메서드를 이해하기 위해 내부를 살펴보겠습니다.
/**
* Closing a {@code ByteArrayInputStream} has no effect. The methods in
* this class can be called after the stream has been closed without
* generating an {@code IOException}.
*/
public void close() throws IOException {
}
close 메소드에 대한 문서는 ByteArrayInputStream 을 닫아도 아무 효과가 없다고 알려줍니다. ByteArrayInputStream 클래스 메서드는 IOException을 발생시키지 않고 스트림이 닫힌 후에 호출할 수 있습니다 .
어떤 결론을 내릴 수 있습니까?
바이트 배열에서 데이터를 읽으려면 ByteArrayInputStream 이 필요합니다 . 일반적으로 이 클래스를 단독으로보다는 InputStreams 로 작업하는 방법을 알고 있는 다른 코드와 함께 사용하는 것이 좋습니다 .