이 섹션에서는 Spring Boot를 사용하여 작은 RESTful 애플리케이션을 만듭니다. 우리 애플리케이션은 개요의 이전 부분 에 있는 예에서 고객에 대한 CRUD(만들기, 읽기, 업데이트, 삭제) 작업을 구현합니다 . 시작하려면 파일 -> 새로 만들기 -> 프로젝트... 메뉴를 통해 새 Spring Boot 애플리케이션을 만듭니다 . 열리는 창에서 Spring Initializr를 선택하고 프로젝트 SDK를 지정합니다. "다음" 버튼을 클릭합니다. 다음 창에서 프로젝트 유형으로 "Maven Project"를 지정하고 "Group" 및 "Artifact"를 지정합니다. "Next" 버튼을 클릭합니다. 다음 창에서 프로젝트에 필요한 Spring Framework 구성 요소를 선택해야 합니다. Spring Web이면 충분합니다. "다음" 버튼을 클릭합니다. 이제 남은 것은 프로젝트 이름과 파일 시스템에서의 위치를 표시하는 것입니다. "마침" 버튼을 클릭하십시오. 프로젝트가 생성되고 이제 구조를 볼 수 있습니다. IDEA는 우리를 위해 Maven 배포 설명자(pom.xml)와 애플리케이션의 기본 클래스( )를 생성했습니다 . RestExampleApplication다음과 같습니다.
@SpringBootApplication
public class RestExampleApplication {

   public static void main(String[] args) {
       SpringApplication.run(RestExampleApplication.class, args);
   }

}
REST 기능 만들기
우리의 응용 프로그램은 고객 관리 시스템입니다. 따라서 가장 먼저 해야 할 일은 고객 엔터티를 만드는 것입니다. POJO(Plain Old Java Object) 클래스가 됩니다. model패키지 안에 패키지를 만듭니다 com.codegym.lessons.rest_example. 패키지 내부에 model다음을 생성합니다 Customer.
public class Customer {

   private Integer id;
   private String name;
   private String email;
   private String phone;

   public Integer getId() {
       return id;
   }

   public void setId(Integer id) {
       this.id = id;
   }

   public String getName() {
       return name;
   }

   public void setName(String name) {
       this.name = name;
   }

   public String getEmail() {
       return email;
   }

   public void setEmail(String email) {
       this.email = email;
   }

   public String getPhone() {
       return phone;
   }

   public void setPhone(String phone) {
       this.phone = phone;
   }
}
이 서비스는 고객에 대한 CRUD 작업을 구현합니다. 다음 단계는 이러한 작업을 구현할 서비스를 만드는 것입니다. 패키지 에서 패키지를 com.codegym.lessons.rest_example생성합니다 service. 그리고 그 안에 CustomerService인터페이스를 만듭니다. 주석이 있는 인터페이스 코드는 다음과 같습니다.
public interface CustomerService {

   /**
    * Creates a new customer
    * @param customer - Customer to be created
    */
   void create(Customer customer);

   /**
    * Returns a list of all existing customers
    * @return List of customers
    */
   List<Customer> readAll();

   /**
    * Returns a customer based on its ID
    * @param id - Customer ID
    * @return - Customer object with the given ID
    */
   Customer read(int id);

   /**
    * Updates the customer with the given ID,
    * according to the passed customer
    * @param customer - Customer to use to update the data
    * @param id - ID of the customer you want to update
    * @return - true if the data has been updated, otherwise false
    */
   boolean update(Customer customer, int id);

   /**
    * Deletes the customer with the given ID
    * @param id - ID of the customer to be deleted
    * @return - true if the customer was deleted, otherwise false
    */
   boolean delete(int id);
}
다음으로 이 인터페이스를 구현해야 합니다. 이제 Map<Integer, Customer>고객을 저장합니다. 맵의 키는 고객 ID가 되고 값은 고객 자신이 됩니다. 이는 실제 데이터베이스 작업의 세부 사항으로 이 예제에 과부하가 걸리지 않도록 하기 위한 것입니다. 그러나 미래에는 실제 데이터베이스에 연결할 수 있는 인터페이스의 또 다른 구현을 작성할 수 있을 것입니다. 패키지 에서 service인터페이스 구현을 만듭니다 CustomerService.
@Service
public class CustomerServiceImpl implements CustomerService {

   // Customer repository
   private static final Map<Integer, Customer> CUSTOMER_REPOSITORY_MAP = new HashMap<>();

   // Variable for generating a customer ID
   private static final AtomicInteger CUSTOMER_ID_HOLDER = new AtomicInteger();

   @Override
   public void create(Customer customer) {
       final int customerId = CUSTOMER_ID_HOLDER.incrementAndGet();
       customer.setId(customerId);
       CUSTOMER_REPOSITORY_MAP.put(customerId, customer);
   }

   @Override
   public List<Customer> readAll() {
       return new ArrayList<>(CUSTOMER_REPOSITORY_MAP.values());
   }

   @Override
   public Customer read(int id) {
       return CUSTOMER_REPOSITORY_MAP.get(id);
   }

   @Override
   public boolean update(Customer customer, int id) {
       if (CUSTOMER_REPOSITORY_MAP.containsKey(id)) {
           customer.setId(id);
           CUSTOMER_REPOSITORY_MAP.put(id, customer);
           return true;
       }

       return false;
   }

   @Override
   public boolean delete(int id) {
       return CUSTOMER_REPOSITORY_MAP.remove(id) != null;
   }
}
주석은 @Service스프링에게 이 클래스가 서비스임을 알려줍니다. 일부 비즈니스 애플리케이션 로직을 구현하는 특별한 유형의 클래스입니다. 결과적으로 이 주석 덕분에 Spring은 종속성 주입을 사용하여 필요한 모든 위치에서 이 클래스의 인스턴스를 제공합니다. 이제 컨트롤러를 만들 차례입니다. 이것은 끝점(URI)으로 전송된 클라이언트 요청을 처리하기 위한 논리를 구현할 특수 클래스입니다. 이 모든 것을 더 명확하게 하기 위해 이 클래스를 점진적으로 만들 것입니다. 먼저 클래스 자체를 만들고 다음에 대한 종속성을 추가합니다 CustomerService.
@RestController
public class CustomerController {

   private final CustomerService customerService;

   @Autowired
   public CustomerController(CustomerService customerService) {
       this.customerService = customerService;
   }
}
어노테이션을 설명해보자: @RestController는 Spring에게 이 클래스가 REST 컨트롤러임을 알려준다. 즉, 이 클래스는 클라이언트 요청을 처리하기 위한 논리를 구현합니다. @Autowired는 여기에 종속성을 추가해야 한다고 Spring에 알립니다. CustomerService인터페이스를 생성자에게 전달합니다 . 이전에 주석으로 이 서비스의 구현을 표시했으며 @Service이제 Spring은 이 구현의 인스턴스를 컨트롤러의 생성자에 전달할 수 있습니다. 다음으로 CRUD 작업을 처리하기 위한 각 컨트롤러 메서드를 구현합니다. 만들기 작업부터 시작하겠습니다. 이를 위해 다음과 같은 create방법을 작성합니다.
@PostMapping(value = "/customers")
public ResponseEntity<?> create(@RequestBody Customer customer) {
   customerService.create(customer);
   return new ResponseEntity<>(HttpStatus.CREATED);
}
이 메서드를 분석해 보겠습니다. @PostMapping(value = "/customers")즉, 이 메서드는 "/customers" 주소로 전송된 POST 요청을 처리합니다. 메서드는 를 반환합니다 ResponseEntity<?>. A ResponseEntity는 응답을 반환하기 위한 특수 클래스입니다. 나중에 HTTP 상태 코드를 클라이언트에 반환하는 데 사용할 것입니다. 메서드에는 매개 @RequestBody Customer customer변수가 있습니다. 이 매개변수의 값은 요청 본문에서 가져옵니다. 주석 이 @RequestBody이를 나타냅니다. 메서드 본문 내에서 create()이전에 생성된 서비스에 대한 메서드를 호출하고 매개 변수에서 받은 고객 컨트롤러에 전달합니다. ResponseEntity그런 다음 새 개체를 만들고 해당 HttpStatusenum 필드를 전달하여 "201 Created" 상태를 반환합니다 . 다음으로read작업: 먼저 사용 가능한 모든 고객 목록을 가져오는 작업을 구현합니다.
@GetMapping(value = "/customers")
public ResponseEntity<List<Customer>> read() {
   final List<Customer> customers = customerService.readAll();

   return customers != null &&  !customers.isEmpty()
           ? new ResponseEntity<>(customers, HttpStatus.OK)
           : new ResponseEntity<>(HttpStatus.NOT_FOUND);
}
자세히 살펴보겠습니다. @GetMapping(value = "/customers")— 여기에 있는 모든 것은 주석과 비슷 @PostMapping하지만 이제 GET 요청을 처리하고 있습니다. 이번에는 를 반환 ResponseEntity<List<Customer>>하고 HTTP 상태 외에도 고객 목록이 될 응답 본문도 반환합니다. Spring의 REST 컨트롤러에서 모든 것은 POJO 객체와 POJO 객체의 컬렉션이며 달리 지정하지 않는 한 응답 본문으로 반환되고 자동으로 JSON으로 직렬화됩니다. 이것은 우리에게 완벽하게 어울립니다. 메서드 내에서 서비스를 사용하여 모든 고객 목록을 가져옵니다. 다음으로 목록이 null이 아니고 비어 있지 않으면 다음을 사용합니다.ResponseEntity고객 목록과 "200 OK" HTTP 상태 코드를 반환하는 클래스입니다. 그렇지 않으면 단순히 "404 Not Found" HTTP 상태 코드를 반환합니다. 이제 ID를 사용하여 고객을 확보하는 기능을 구현할 것입니다.
@GetMapping(value = "/customers/{id}")
public ResponseEntity<Customer> read(@PathVariable(name = "id") int id) {
   final Customer customer = customerService.read(id);

   return customer != null
           ? new ResponseEntity<>(customer, HttpStatus.OK)
           : new ResponseEntity<>(HttpStatus.NOT_FOUND);
}
여기서 한 가지 새로운 점은 경로 변수입니다. 변수는 URI: 에 정의됩니다 value = "/customers/{id}". 중괄호로 표시합니다. int그리고 주석 을 사용하여 메소드 매개변수 로 수신합니다 @PathVariable(name = "id"). 이 메서드는 형식의 URI로 전송된 요청을 수락합니다 /customers/{id}. 여기서 {id}는 숫자 값을 나타냅니다. int id이 값은 이후에 변수를 통해 메소드 매개변수로 전달됩니다 . 본문에서 Customer서비스를 사용하여 객체를 얻고 받은 id. 그런 다음 목록과 유사하게 "200 OK" 상태와 개체 Customer자체를 반환하거나 시스템에 해당 고객이 없는 경우 단순히 "404 Not Found" 상태를 반환 합니다 id. 여전히 업데이트와 삭제라는 두 가지 작업을 구현해야 합니다. 다음은 이러한 메서드에 대한 코드입니다.
@PutMapping(value = "/customers/{id}")
public ResponseEntity<?> update(@PathVariable(name = "id") int id, @RequestBody Customer customer) {
   final boolean updated = customerService.update(customer, id);

   return updated
           ? new ResponseEntity<>(HttpStatus.OK)
           : new ResponseEntity<>(HttpStatus.NOT_MODIFIED);
}

@DeleteMapping(value = "/customers/{id}")
public ResponseEntity<?> delete(@PathVariable(name = "id") int id) {
   final boolean deleted = customerService.delete(id);

   return deleted
           ? new ResponseEntity<>(HttpStatus.OK)
           : new ResponseEntity<>(HttpStatus.NOT_MODIFIED);
}
이러한 방법에는 본질적으로 새로운 것이 없으므로 자세한 설명은 생략합니다. 언급할 가치가 있는 유일한 것은 update()메서드가 PUT 요청( @PutMapping주석)을 처리하고 delete()메서드가 DELETE 요청( DeleteMapping주석)을 처리한다는 것입니다. 컨트롤러의 전체 코드는 다음과 같습니다.
@RestController
public class CustomerController {

   private final CustomerService customerService;

   @Autowired
   public CustomerController(CustomerService customerService) {
       this.customerService = customerService;
   }

   @PostMapping(value = "/customers")
   public ResponseEntity<?> create(@RequestBody Customer customer) {
       customerService.create(customer);
       return new ResponseEntity<>(HttpStatus.CREATED);
   }

   @GetMapping(value = "/customers")
   public ResponseEntity<List<Customer>> read() {
       final List<Customer> customers = customerService.readAll();

       return customers != null &&  !customers.isEmpty()
               ? new ResponseEntity<>(customers, HttpStatus.OK)
               : new ResponseEntity<>(HttpStatus.NOT_FOUND);
   }

   @GetMapping(value = "/customers/{id}")
   public ResponseEntity<Customer> read(@PathVariable(name = "id") int id) {
       final Customer customer = customerService.read(id);

       return customer != null
               ? new ResponseEntity<>(customer, HttpStatus.OK)
               : new ResponseEntity<>(HttpStatus.NOT_FOUND);
   }

   @PutMapping(value = "/customers/{id}")
   public ResponseEntity<?> update(@PathVariable(name = "id") int id, @RequestBody Customer customer) {
       final boolean updated = customerService.update(customer, id);

       return updated
               ? new ResponseEntity<>(HttpStatus.OK)
               : new ResponseEntity<>(HttpStatus.NOT_MODIFIED);
   }

   @DeleteMapping(value = "/customers/{id}")
   public ResponseEntity<?> delete(@PathVariable(name = "id") int id) {
       final boolean deleted = customerService.delete(id);

       return deleted
               ? new ResponseEntity<>(HttpStatus.OK)
               : new ResponseEntity<>(HttpStatus.NOT_MODIFIED);
   }
}
결과적으로 우리 프로젝트의 구조는 다음과 같습니다.
시작 및 테스트
응용 프로그램을 시작하려면 클래스 main()에서 메서드를 실행하기만 하면 됩니다 RestExampleApplication. 그러나 RESTful 웹 서비스를 테스트하려면 추가 소프트웨어를 다운로드해야 합니다. 사실 GET 요청은 일반 브라우저에서 보내는 것이 매우 간단하지만 일반 브라우저는 POST, PUT 및 DELETE 요청을 보낼 수 없습니다. 걱정하지 마세요. Postman이라는 프로그램을 사용하여 HTTP 요청을 보낼 수 있습니다. 여기에서 다운로드할 수 있습니다 . Postman을 다운로드하고 설치한 후 애플리케이션 테스트를 시작합니다. 이렇게 하려면 프로그램을 열고 새 요청을 만듭니다. 왼쪽 상단 모서리에 있는 "새로 만들기" 버튼을 클릭합니다. 그런 다음 "요청"을 선택합니다. 다음으로 이름을 지정하고 저장합니다. 이제 서버에 POST 요청을 보내고 첫 번째 고객을 생성해 보겠습니다. 이런 식으로 여러 고객을 만듭니다. 그런 다음 요청 유형을 GET으로 변경하고 요청을 서버로 보냅니다.
요약
축하해요! 우리는 REST를 충분히 다루었습니다. 많은 양의 자료가 있었지만 도움이 되었기를 바랍니다.
REST가 무엇인지 배웠습니다.
우리는 REST가 어떻게 존재하게 되었는지에 대해 배웠습니다.
우리는 이 아키텍처 스타일의 한계와 원칙에 대해 이야기했습니다.
클라이언트-서버 아키텍처
무국적자
캐싱
균일한 인터페이스
레이어
주문형 코드(선택사항)
REST가 제공하는 이점을 살펴보았습니다.
서버와 클라이언트가 HTTP 프로토콜을 통해 어떻게 상호 작용하는지 자세히 조사했습니다.
요청과 응답을 자세히 살펴보았습니다. 우리는 그들의 구성 부분을 해부했습니다.
마지막으로 Spring Boot를 사용하여 우리만의 작은 RESTful 애플리케이션을 작성하여 실질적인 경험을 얻었습니다. 그리고 Postman을 사용하여 테스트하는 방법도 배웠습니다.
휴. 그것은 많았지만 여전히 숙제로 할 일이 있습니다.
숙제
다음을 시도하십시오.
위의 설명에 따라 자신만의 Spring Boot 프로젝트를 생성하고 강의에서와 동일한 로직을 구현합니다. 모든 것을 정확하게 반복하십시오.
응용 프로그램을 시작하십시오.
Postman(또는 요청을 보내기 위한 다른 도구(예: curl))을 다운로드하고 구성합니다.

 "다음" 버튼을 클릭합니다. 다음 창에서 프로젝트 유형으로 "Maven Project"를 지정하고 "Group" 및 "Artifact"를 지정합니다.
  "Next" 버튼을 클릭합니다. 다음 창에서 프로젝트에 필요한 Spring Framework 구성 요소를 선택해야 합니다. Spring Web이면 충분합니다.
  "다음" 버튼을 클릭합니다. 이제 남은 것은 프로젝트 이름과 파일 시스템에서의 위치를 표시하는 것입니다.
  "마침" 버튼을 클릭하십시오. 프로젝트가 생성되고 이제 구조를 볼 수 있습니다. IDEA는 우리를 위해
  Maven 배포 설명자(pom.xml)와 애플리케이션의 기본 클래스( )를 생성했습니다 .


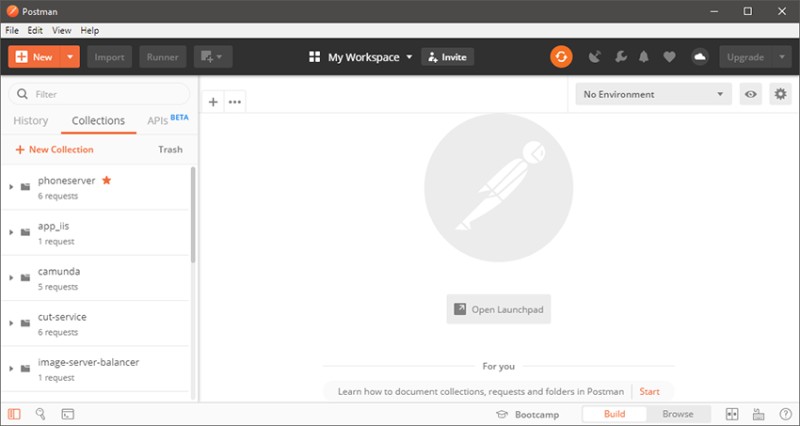 왼쪽 상단 모서리에 있는 "새로 만들기" 버튼을 클릭합니다. 그런 다음 "요청"을 선택합니다.
  다음으로 이름을 지정하고 저장합니다. 이제 서버에 POST 요청을 보내고 첫 번째 고객을 생성해 보겠습니다.
  이런 식으로 여러 고객을 만듭니다. 그런 다음 요청 유형을 GET으로 변경하고 요청을 서버로 보냅니다.
GO TO FULL VERSION