In this section, we will create a small RESTful application using Spring Boot. Our application will implement CRUD (Create, Read, Update, Delete) operations on the customers from the example in the previous part of the overview.
To start, we'll create a new Spring Boot application through the menu: File -> New -> Project...
In the window that opens, select Spring Initializr and specify the Project SDK:
Click the "Next" button. In the next window, specify "Maven Project" as the project type, specify the "Group" and "Artifact":
Click the "Next" button. In the next window, we need to select the Spring Framework components necessary for the project. Spring Web will be sufficient for us:
Click the "Next" button. Now all that remains is to indicate the name of the project and its location in the file system:
Click the "Finish" button. The project is created, and now we can see its structure:
IDEA generated a Maven deployment descriptor (pom.xml) and the application's main class (RestExampleApplication) for us. Here's what they look like:
@SpringBootApplication
public class RestExampleApplication {

   public static void main(String[] args) {
       SpringApplication.run(RestExampleApplication.class, args);
   }

}
Creating REST functionality
Our application is a customer management system. So, the first thing we need to do is create a customer entity. It will be a POJO (plain old Java object) class.
Create a model package inside the com.codegym.lessons.rest_example package. Inside the model package, create the Customer:
public class Customer {

   private Integer id;
   private String name;
   private String email;
   private String phone;

   public Integer getId() {
       return id;
   }

   public void setId(Integer id) {
       this.id = id;
   }

   public String getName() {
       return name;
   }

   public void setName(String name) {
       this.name = name;
   }

   public String getEmail() {
       return email;
   }

   public void setEmail(String email) {
       this.email = email;
   }

   public String getPhone() {
       return phone;
   }

   public void setPhone(String phone) {
       this.phone = phone;
   }
}
The service will implement CRUD operations on customers. The next step is to create a service that will implement these operations. In the com.codegym.lessons.rest_example package, create a service package. And inside that, create a CustomerService interface.
Here is the interface code with comments:
public interface CustomerService {

   /**
    * Creates a new customer
    * @param customer - Customer to be created
    */
   void create(Customer customer);

   /**
    * Returns a list of all existing customers
    * @return List of customers
    */
   List<Customer> readAll();

   /**
    * Returns a customer based on its ID
    * @param id - Customer ID
    * @return - Customer object with the given ID
    */
   Customer read(int id);

   /**
    * Updates the customer with the given ID,
    * according to the passed customer
    * @param customer - Customer to use to update the data
    * @param id - ID of the customer you want to update
    * @return - true if the data has been updated, otherwise false
    */
   boolean update(Customer customer, int id);

   /**
    * Deletes the customer with the given ID
    * @param id - ID of the customer to be deleted
    * @return - true if the customer was deleted, otherwise false
    */
   boolean delete(int id);
}
Next, we need to implement this interface. Now a Map<Integer, Customer> will store our customers. The map's keys will be the customer IDs, and the values will be the customers themselves. This is done so as to not overload this example with the specifics of working with a real database. However, in the future we will be able to write another implementation of the interface, which will make it possible to connect to a real database.
In the service package, create an implementation of the CustomerService interface:
@Service
public class CustomerServiceImpl implements CustomerService {

   // Customer repository
   private static final Map<Integer, Customer> CUSTOMER_REPOSITORY_MAP = new HashMap<>();

   // Variable for generating a customer ID
   private static final AtomicInteger CUSTOMER_ID_HOLDER = new AtomicInteger();

   @Override
   public void create(Customer customer) {
       final int customerId = CUSTOMER_ID_HOLDER.incrementAndGet();
       customer.setId(customerId);
       CUSTOMER_REPOSITORY_MAP.put(customerId, customer);
   }

   @Override
   public List<Customer> readAll() {
       return new ArrayList<>(CUSTOMER_REPOSITORY_MAP.values());
   }

   @Override
   public Customer read(int id) {
       return CUSTOMER_REPOSITORY_MAP.get(id);
   }

   @Override
   public boolean update(Customer customer, int id) {
       if (CUSTOMER_REPOSITORY_MAP.containsKey(id)) {
           customer.setId(id);
           CUSTOMER_REPOSITORY_MAP.put(id, customer);
           return true;
       }

       return false;
   }

   @Override
   public boolean delete(int id) {
       return CUSTOMER_REPOSITORY_MAP.remove(id) != null;
   }
}
The @Service annotation tells spring that this class is a service. This is a special type of class that implements some business application logic. Subsequently, thanks to this annotation, Spring will use dependency injection to provide us with an instance of this class in all the places where it is needed.
Now it's time to create a controller. This is a special class where we will implement the logic for processing client requests sent to endpoints (URIs).
To make all this clearer, we will create this class incrementally. First, create the class itself and add a dependency on CustomerService:
@RestController
public class CustomerController {

   private final CustomerService customerService;

   @Autowired
   public CustomerController(CustomerService customerService) {
       this.customerService = customerService;
   }
}
Let's explain the annotations:
@RestController tells Spring that this class is a REST controller. In other words, this class implements the logic for processing client requests.
@Autowired tells Spring that a dependency needs to be added here. We pass the CustomerService interface to the constructor. Earlier, we marked the implementation of this service with the @Service annotation, and now Spring will be able to pass an instance of this implementation to the controller's constructor.
Next, we will implement each controller method for handling CRUD operations. Let's start with the create operation. To do this, we write a create method:
@PostMapping(value = "/customers")
public ResponseEntity<?> create(@RequestBody Customer customer) {
   customerService.create(customer);
   return new ResponseEntity<>(HttpStatus.CREATED);
}
Let's analyze this method:
@PostMapping(value = "/customers") mean that this method processes POST requests sent to the address "/customers".
The method returns a ResponseEntity<?>. A ResponseEntity is a special class for returning responses. Later, we will use it to return an HTTP status code to the client.
The method has a @RequestBody Customer customer parameter. The value of this parameter comes from the request body. The @RequestBody annotation indicates this.
Inside the body of the method, we call the create() method on the previously created service and pass it the customer controller received in the parameters.
Then we return the "201 Created" status by creating a new ResponseEntity object and passing the corresponding HttpStatus enum field to it.
Next, we'll implement the read operation:
First, we'll implement the operation to get a list of all available customers:
@GetMapping(value = "/customers")
public ResponseEntity<List<Customer>> read() {
   final List<Customer> customers = customerService.readAll();

   return customers != null &&  !customers.isEmpty()
           ? new ResponseEntity<>(customers, HttpStatus.OK)
           : new ResponseEntity<>(HttpStatus.NOT_FOUND);
}
Let's dive in:
@GetMapping(value = "/customers") — everything here is similar to the @PostMapping annotation, but now we are processing GET requests.
This time we return a ResponseEntity<List<Customer>>, and in addition to an HTTP status, we will also return a response body, which will be the list of customers.
In Spring's REST controllers, everything is POJO objects and collections of POJO objects, which are returned as response bodies and automatically serialized into JSON, unless otherwise specified. This suits us perfectly.
Inside the method, we use our service to get a list of all customers. Next, if the list is not null and not empty, then we use the ResponseEntity class to return the list of customers and the "200 OK" HTTP status code. Otherwise, we simply return the "404 Not Found" HTTP status code.
Now we will implement the ability to get a customer using its ID:
@GetMapping(value = "/customers/{id}")
public ResponseEntity<Customer> read(@PathVariable(name = "id") int id) {
   final Customer customer = customerService.read(id);

   return customer != null
           ? new ResponseEntity<>(customer, HttpStatus.OK)
           : new ResponseEntity<>(HttpStatus.NOT_FOUND);
}
One new thing here is the path variable. The variable is defined in the URI: value = "/customers/{id}". We indicate it in curly braces. And we receive it as an int method parameter using the @PathVariable(name = "id") annotation.
This method will accept requests sent to URIs in the form /customers/{id}, where {id} represents any numeric value. This value is subsequently passed via the int id variable to the method parameter.
In the body, we get the Customer object using our service and the received id. And then, by analogy with the list, we return either the "200 OK" status and the Customer object itself, or simply the "404 Not Found" status if the system has no customer with that id.
We still need to implement two operations: update and delete. Here is the code for these methods:
@PutMapping(value = "/customers/{id}")
public ResponseEntity<?> update(@PathVariable(name = "id") int id, @RequestBody Customer customer) {
   final boolean updated = customerService.update(customer, id);

   return updated
           ? new ResponseEntity<>(HttpStatus.OK)
           : new ResponseEntity<>(HttpStatus.NOT_MODIFIED);
}

@DeleteMapping(value = "/customers/{id}")
public ResponseEntity<?> delete(@PathVariable(name = "id") int id) {
   final boolean deleted = customerService.delete(id);

   return deleted
           ? new ResponseEntity<>(HttpStatus.OK)
           : new ResponseEntity<>(HttpStatus.NOT_MODIFIED);
}
There's nothing essentially new in these methods, so we'll skip the detailed description. The only thing worth mentioning is that the update() method handles PUT requests (@PutMapping annotation), and the delete() method handles DELETE requests (DeleteMapping annotation).
Here is the full code for the controller:
@RestController
public class CustomerController {

   private final CustomerService customerService;

   @Autowired
   public CustomerController(CustomerService customerService) {
       this.customerService = customerService;
   }

   @PostMapping(value = "/customers")
   public ResponseEntity<?> create(@RequestBody Customer customer) {
       customerService.create(customer);
       return new ResponseEntity<>(HttpStatus.CREATED);
   }

   @GetMapping(value = "/customers")
   public ResponseEntity<List<Customer>> read() {
       final List<Customer> customers = customerService.readAll();

       return customers != null &&  !customers.isEmpty()
               ? new ResponseEntity<>(customers, HttpStatus.OK)
               : new ResponseEntity<>(HttpStatus.NOT_FOUND);
   }

   @GetMapping(value = "/customers/{id}")
   public ResponseEntity<Customer> read(@PathVariable(name = "id") int id) {
       final Customer customer = customerService.read(id);

       return customer != null
               ? new ResponseEntity<>(customer, HttpStatus.OK)
               : new ResponseEntity<>(HttpStatus.NOT_FOUND);
   }

   @PutMapping(value = "/customers/{id}")
   public ResponseEntity<?> update(@PathVariable(name = "id") int id, @RequestBody Customer customer) {
       final boolean updated = customerService.update(customer, id);

       return updated
               ? new ResponseEntity<>(HttpStatus.OK)
               : new ResponseEntity<>(HttpStatus.NOT_MODIFIED);
   }

   @DeleteMapping(value = "/customers/{id}")
   public ResponseEntity<?> delete(@PathVariable(name = "id") int id) {
       final boolean deleted = customerService.delete(id);

       return deleted
               ? new ResponseEntity<>(HttpStatus.OK)
               : new ResponseEntity<>(HttpStatus.NOT_MODIFIED);
   }
}
As a result, the structure of our project is as follows:
Launching and testing
To start our application, just run the main() method in the RestExampleApplication class.
But to test RESTful web services, we need to download additional software.
The fact is that GET requests are quite simple to send from an ordinary browser, but an ordinary browser can't send POST, PUT and DELETE requests.
Don't worry: you can use a program called Postman to send any HTTP requests. You can download it here.
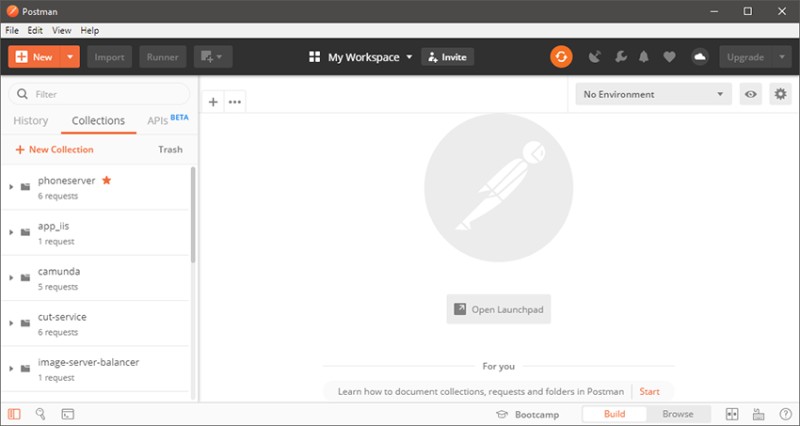
After downloading and installing Postman, we begin testing our application.
To do this, open the program and create a new request:
Click the "New" button in the upper left corner. Next, select "Request":
Next, give it a name and save it.
Now let's try to send a POST request to the server and create the first customer:
We create several customers in this way. Then we change the request type to GET and send the request to the server:
Summary
Congratulations! We've sufficiently covered REST. There was a large volume of material, but hopefully it was useful for you:
We learned what REST is.
We learned about how REST came into existence.
We talked about the limitations of and principles behind this architectural style:
client-server architecture
stateless
caching
uniform interface
layers
code on demand (optional)
We explored the benefits provided by REST
We examined in detail how the server and client interact with each other via the HTTP protocol.
We took a closer look at requests and responses. We dissected their constituent parts.
Finally, we got some practical experience by writing our own small RESTful application using Spring Boot. And we even learned how to test it using Postman.
Phew. That was a lot, but there is still something for you to do as homework.
Homework
Try the following:
Following the description above, create your own Spring Boot project and implement the same logic as in the lesson. Repeat everything exactly.
Launch the application.
Download and configure Postman (or any other tool for sending requests, for example, curl).
Test POST and GET requests in the same way described in the lesson.

 Click the "Next" button. In the next window, specify "Maven Project" as the project type, specify the "Group" and "Artifact":
 Click the "Next" button. In the next window, we need to select the Spring Framework components necessary for the project. Spring Web will be sufficient for us:
 Click the "Next" button. Now all that remains is to indicate the name of the project and its location in the file system:
 Click the "Finish" button. The project is created, and now we can see its structure:
 IDEA generated a Maven deployment descriptor (pom.xml) and the application's main class (


 Click the "New" button in the upper left corner. Next, select "Request":
 Next, give it a name and save it.
Now let's try to send a POST request to the server and create the first customer:
Next, give it a name and save it.
Now let's try to send a POST request to the server and create the first customer:
 We create several customers in this way. Then we change the request type to GET and send the request to the server:

GO TO FULL VERSION