Loading
Well, since I praised MySQL so much, I think it's time to install it. To date, the current version is MySQL 8.0.2, and we will install it.
First, let's go to the page .
There we see a description of the commercial version of MySQL and a small link below. This is what we need:

Click on the link and go to the page with a list of free products. I choose MySQL Windows Installer:

Then you choose any of the two options (they are the same) and download any.
If you have Linux, MacOS or something else, you can download MySQL Community Server as a zip or dmg file:

Instructions for: MacOS or linux
I seem to be saying obvious things, but it's better to make sure once again. Accidentally install something wrong, otherwise I'll save you time.
Installation
Let's start the installation – launch Windows Installer (or any other of your choice).After the installation process starts, you will see several options:

- Developer Default. The default installation. This includes all the components necessary for developers.
- Server only. This option entails the installation of the DBMS server and nothing more.
- Client only. In this case, only the client part of the DBMS will be installed.
- Full. With this choice, all components of the downloaded distribution will be installed.
- Custom. The custom option allows the developer to choose the components they need. This is for the experienced.
Since we are just starting to learn about MySQL, we need a full distribution installation, i.e., Full. So, select Full and press Next.

Now let's install all the DBMS components one by one. Press Execute in the opened window.

If a green checkmark appears to the left of the component, it means that everything is fine and the file is loaded. When check marks appear Next to all components, the status will change from Ready to Download to Complete. Click Next.

The installer will prompt you to configure the settings in the Next step. Click Next.

Configuration
In the first line, you can choose the type of configuration. Development Computer – that's exactly what we need.
It's better not to touch other parameters. Leave them as default and press Next.

Now we are offered to choose an authentication method. No time to delve into it (well, maybe someday, but not now), just leave the recommended one and press Next again.

In the Next step, the installer will offer to create users who will Execute queries on this SQL server.
Since the server is intended only for learning and development, let's keep only one root user: enter your password. When in the future you need to enter this same password, I will refer to it as the mysql-root-password.

At this stage we can also add other users. To do this, click on Add User and fill out the fields:
- User Name: user name.
- Host: host (the one from which the user will be authorized).
- Role: the user’s role in the context of working in the DBMS.
- Password and Confirm Password. Everything is clear here too. Enter the password for the created user and confirm that it was entered correctly.
Further, MySQL Server in the future can work as a regular program (application) or as a service. I suggest you specify all the settings as I have.

Permissions to server files located at: C:\ProgramData\MySQL\MySQL Server 8.0\Data We leave everything as it is and move on.

Now click Execute to apply the configuration settings.
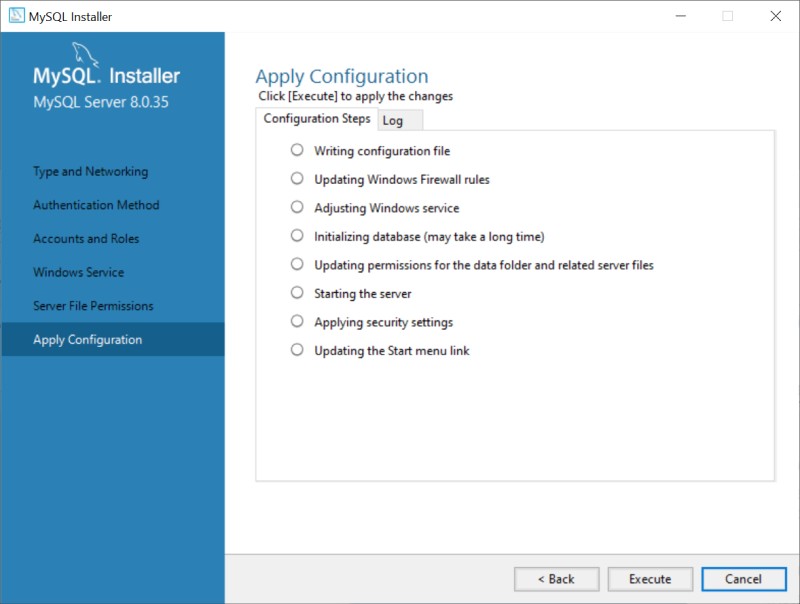
When green check marks appear to the left of the listed items, click Finish.
Configuring MySQL Router
When the MySQL Router configuration window opens, just click Finish without changing anything. These settings are required to distribute the load among all MySQL programs in the cluster.

Ready. Click Finish and Next
Configuring Samples and Examples
A few steps ago, we created a login and password for the root user. I hope you haven't forgotten it yet, because now a window will open where you should enter them. Enter and click Check. With this very action you check the connection.

I hope everything worked out for you and you see a green checkmark Next to Check and the Connection succeeded status, like in this screenshot. If not, then double-check your username and password. If everything is fine, click Next again and apply all the parameters with the Execute button. This will start the process of installing the required components. When it Finishes, click Finish.

Are you here? Congratulations, the installation was completed successfully! Now, for further work and configuration, let’s launch MySQL Workbench.

GO TO FULL VERSION