What is the CodeGym plugin, and why do you need it?
This is a special software component that you can install into the IntelliJ IDEA development environment. It allows you to work with tasks from the CodeGym course: write solutions, send them for verification, match your own solution with the “correct” one, and much more. The progress in solving tasks in the plugin synchronizes with your CodeGym account, so the progress on tasks will look the same both on the web platform and in the development environment.
We advise you to start working with the plugin as soon as possible. It is more convenient for solving complex tasks, and it will help you quickly get used to the popular professional development tool – IntelliJ IDEA.
Installing and Activating the CodeGym Plugin
The minimum required version is 2023.1. The plugin is not supported in the older versions. You can download the newest version of IntelliJ IDEA Community Edition here.
You can download the CodeGym plugin from JetBrains marketplace right in your IDE.
- Open Settings. Windows/Linux
File - Settings, MacOSIntellij IDEA - Preferences. And click on the Plugins section in the side menu of the pop-up window. - Open the Marketplace tab and type
codegymin the search bar: - Click Install.
- Restart IntelliJ IDEA to begin working with the plugin.
- After installing the plugin, you will see a slightly modified interface and a Login button on the top horizontal bar. After you click, the login window will open, and you’ll need to type your secret key:
- To open a new task, click on Tasks icon in the left vertical bar, and then on the task card in the sidebar on the left, and in the pop-up window, click Open:
- Enter your solution.
Now you can submit the task to verification. Click the Validate button:


You can find the secret key in the section “Settings” → “Security & sign-in” at CodeGym.
After login, the project and CodeGym SDK will start downloading (no need to change to another version)

A window with two tabs pops up. One contains the task conditions, and the other tab (Solution) is where you enter your code. That's it! Now you're ready to start working on the task.


The plugin is installed and you can solve the tasks.
Important: Read about the newbie mode in the plugin
Below is a list of the most popular questions and answers about working with the plugin.
Basic Plugin Settings
How to switch between light and dark color themes?
Click on the “switcher” on the top panel, right next to your avatar.

How to work on the solutions of multiple tasks at the same time?
If you want to have the files with the solutions of multiple tasks stay open when you switch between their tabs, go to the Settings menu and deactivate the mode Close files when changing tasks:

- If this mode is active, the file with the solution of the current task will be closed when you switch from one task to another (by clicking on the card of another task);
- If you disable this mode, both the file with the solution of the current task and the file for solving the new task will be available in this panel, and it will be possible to switch between them.
How to change the font size in task condition?
Open Settings and choose the required parameter in a field Font size in the task condition.

How to turn off the CodeGym plugin in IntelliJ IDEA?
Open Menu and click on Turn off plugin.

Solving the Course Tasks in IntelliJ IDEA
How do you use the task filters?
After you log in to your account, you’ll see the CodeGym project with the course tasks.In the block on the left, there is a list of tasks. In the top panel, there are task filters to help you sort the contents:

- All – the list of all course tasks
- New – new tasks, available for solving
- In progress – the tasks in progress
- Solved – solved tasks
- Unavailable – unavailable tasks (the tasks from the levels, which you haven’t reached yet)
Why is the task not opening?
Make sure that the task you want to open is available for solving. Choose the filter New / In progress to get the list of available tasks.
The task list or the task condition is missing – how to get them back?
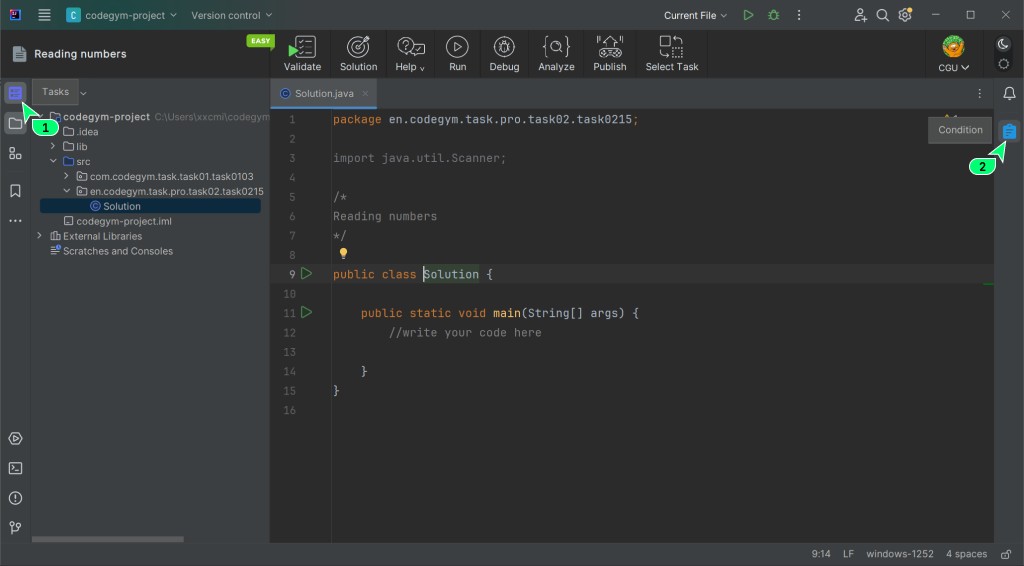
- Click on
Taskson the vertical bar on the left to get the task list back. - Click on
Conditionon the vertical bar on the right to get the task window back.
How to check my solution?
Click Validate on the top bar:

How can I see the correct solution to the task?
Click the Solution button on the top panel.
The correct solution will be displayed on the right, while your current solution will be on the right.

How to go to the task discussion / task help?
Click Help on the top bar
You can choose one of these options:
- Discuss the task on the forum – go to the discussion of the task in the comments section;
- Ask for help – go to the thread with all questions about the task in the "Help" section.
- Reset the task progress – If you accidentally deleted something important in your program or perhaps become confused about your own solution, you can start solving the task again from the very beginning.
How to run the solution without task verification?
Click Run on the top bar. Your solution code will run, but without checking the solution itself.
How to debug my solution?
Click Debug on the top bar
How to get recommendations for improving the code style of my solution?
Click Analyze on the top bar:

How to change the task?
You can change the task by clicking on the task cards in the bar on the left. If you wish to use filters, click on Select task on the top bar.
After that, you will switch to the task selection mode with available filters.
I’ve previously solved the tasks on the CodeGym website. Will my progress be synchronized/displayed in the plugin for IntelliJ IDEA?
Yes. The task list and their statuses are updated automatically every 5 minutes. Therefore, if you solved a task in the web plugin (on the CodeGym site), it will also appear in the list of solved tasks in the IntelliJ IDEA plugin.
If you need to update the task statuses right away, use the command "Synchronize the tasks":

You might need this in case you’ve solved a few tasks on the CodeGym website or have opened a few new tasks there. By clicking "Synchronize the tasks", you’ll synchronize the task statuses for both the website and IntelliJ IDEA.
Solving the Tasks from the “Games” Section
Do I need to make any additional installations to write the solutions for tasks from the “Games” section?
No, you don’t. The game engine in the new plugin is rewritten in Swing. So, you have everything you need to solve this type of tasks right in the plugin, without any additional installations.
How to publish my solution (game) in the “Games” section?
If you decide to implement one of the game projects available on CodeGym and you want to publish it all users to enjoy, there is also a special button for this. Click Publish on the top bar.
Novice Mode and PRO Mode in Plugin
This is a simplified version for those users who have no (or little) experience with IntelliJ IDEA and other development environments. It "hides" some features of IntelliJ IDEA, including the ability to work with projects other than the CodeGym project (course tasks).
This mode will protect you from all sorts of "clicked in the wrong place "and "accidentally deleted the wrong thing "accidents. Thus, in the novice mode, you can only work with tasks from the CodeGym course.
If you try to open another project in IntelliJ IDEA while you’re in novice mode, the system will automatically return you to the CodeGym project. Switch to PRO mode if you wish to work with other coding projects.
How to switch between novice and PRO modes in the plugin?
You can do this in your account Settings. Click on your avatar (top bar, on the left), and choose Settings in the dropdown menu.

The novice mode is set by default. Turn it off to switch to the PRO mode and click Save.
What is a PRO mode in the plugin?
In a PRO mode, you have access to all IntelliJ IDEA tools and features, including the ability to work with other projects, in addition to the tasks from the CodeGym course:

As you can see at the top and bottom, the bars with the IDEA commands and tools appear.
Please note that the main commands (functions) you use when solving tasks are duplicated in the top panel (highlighted in the image).
How to hide the navigation bar in a PRO mode
Click on Settings (⚙️) and dismiss the Show plugin navigation panel.

How to return to the CodeGym project (tasks) in a PRO mode
Click Settings (⚙️) and choose Open CodeGym project. After this, a project containing CodeGym tasks will open.
This will help you delete all project files and restore the structure and SDK (Software Development Kit).
upd. Oct 30th, 2023


