"Here I am. As requested, I'll now tell you how to write your first web server."
"A web server is like an operating system. It's not valuable in and of itself. It's valuable because you can run special web programs (servlets) on it."
"It's these servlets that process the requests that come from users."
"How do they process requests? How do I run my program inside a web server?"
"To write your own servlet, your class must inherit the HttpServlet class. Then implement its doGet() and doPost() methods. When a request comes from a user, the web server creates one of your servlet objects and calls its doGet() method. Or it calls the doPost() method, depending on the type of request coming from the browser."
"But how does my program even get into the web server?"
"That's simple. You write the program, compile it, and put it in a special folder in the directory where you installed Tomcat."
"Servlets are a large and interesting, but separate, topic. So, I won't explain that to you today. I'll tell you a little about something else."
"JSPs are a very interesting type of servlet called. They are kinda like PHP."
"Let's write and run the simplest possible web program using JSPs."

"Let's do it! I'm ready."
"Then let's begin."
Step 1: Create a new web project

"Done."
Step 2: Set the module type to Java Module. Set the application type to Web Application and specify the JDK.

"Done."
Step 3: Give it a name project

"Done."
"You should see a new empty project."
"Almost empty. It will include one file called index.jsp. Find it."
Step 4: Find the JSP file
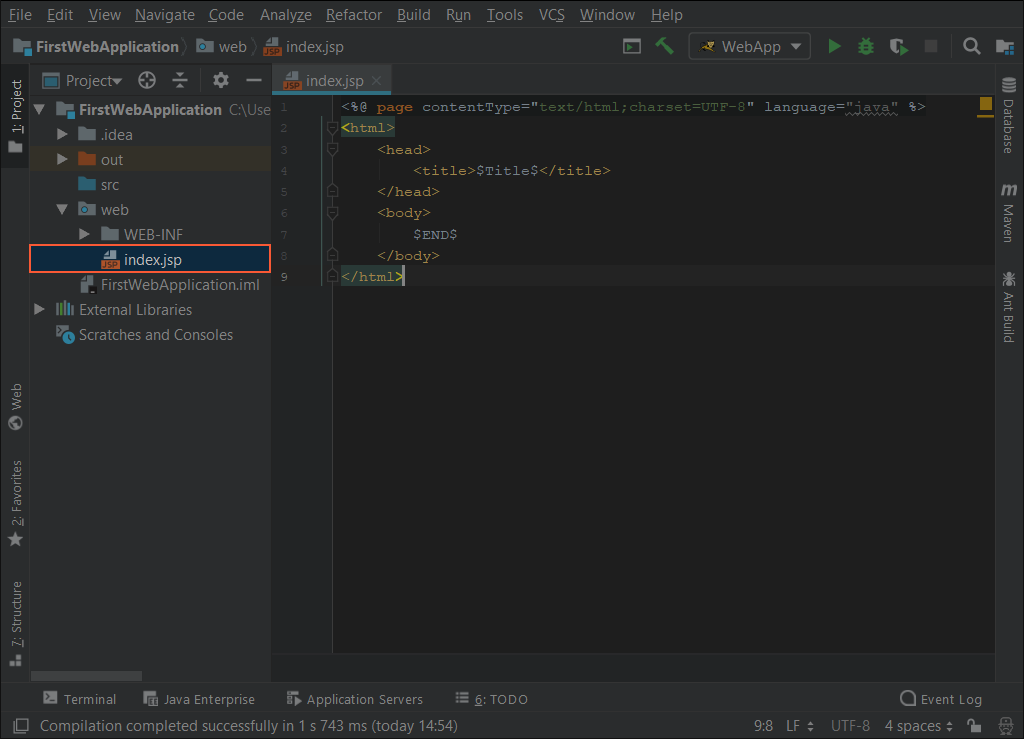
"Found it."
"Great. This is where we can write our servlet's code."
"But let's first configure IntelliJ IDEA a little."
"You can run servlets in Tomcat directly from IntelliJ IDEA. And debug them, if needed. Basically, it's super convenient and awesome. You will appreciate it when the time comes."
"I believe you. So what's next?"
"We'll 'teach' IntelliJ IDEA how to run our web module (our application) in Tomcat."
Step 5: Choose 'Edit Configuration' in the menu

"Done."
Step 6: Create a new configuration by clicking the plus sign

"Done."
Step 7: Indicate what to run (Tomcat Server, Local)

"Specify a name for the configuration in the Name field, which is marked red."
"The port that Tomcat will launch the servlet on is indicated in green."
"We also need to tell IntelliJ IDEA where Tomcat is located. Click the Configure button…"
Step 8: Create a run configuration

"Now you need to select the folder where Tomcat is located:"
Step 9: Specify Tomcat's location


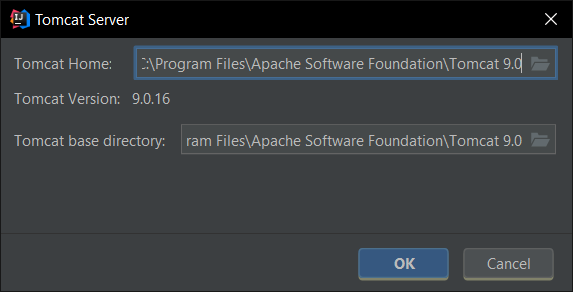
"Done."
"You should get something like this:"
Step 10: Resulting configuration

"Now we need to connect our project to Tomcat."
There's so much that has to be done. It's a good thing I've got such detailed instructions."
"You bet! I try for my friend."
"Now press the Fix button and IDEA will do everything on its own."
Step 11: IDEA connects the project and Tomcat

"Done."
"Great. One more comment. Port 8080 is probably already occupied. After all, Tomcat started running immediately after installation."
"IntelliJ IDEA can add servlets to a running project, but for simplicity, for now, it will start a new Tomcat server every time."
"So, we'll have several Tomcats running?"
"Yep. And each one needs its own port. So, let's change port 8080 to port 8888 in the project settings."
"4 eights. I like it."
Step 12: Change the port to 8888

"Done."
"Great. We're done with the settings."
"So, what's next?"
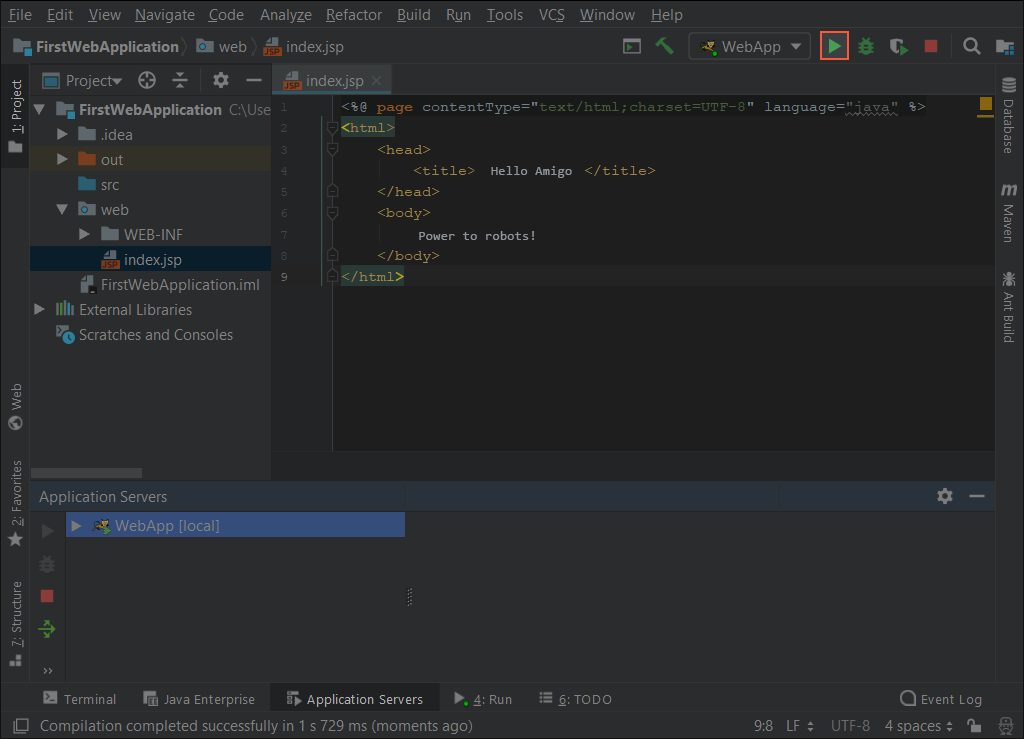
"Now let's change our index.jsp file a little"
"Write something there, for example, «Power to crustaceans!»"
Step 13: Change index.jsp

"No, I'd rather write «Power to robots!»"
"Great. Now there's just a little left to do."
Step 14: Run the servlet and Tomcat
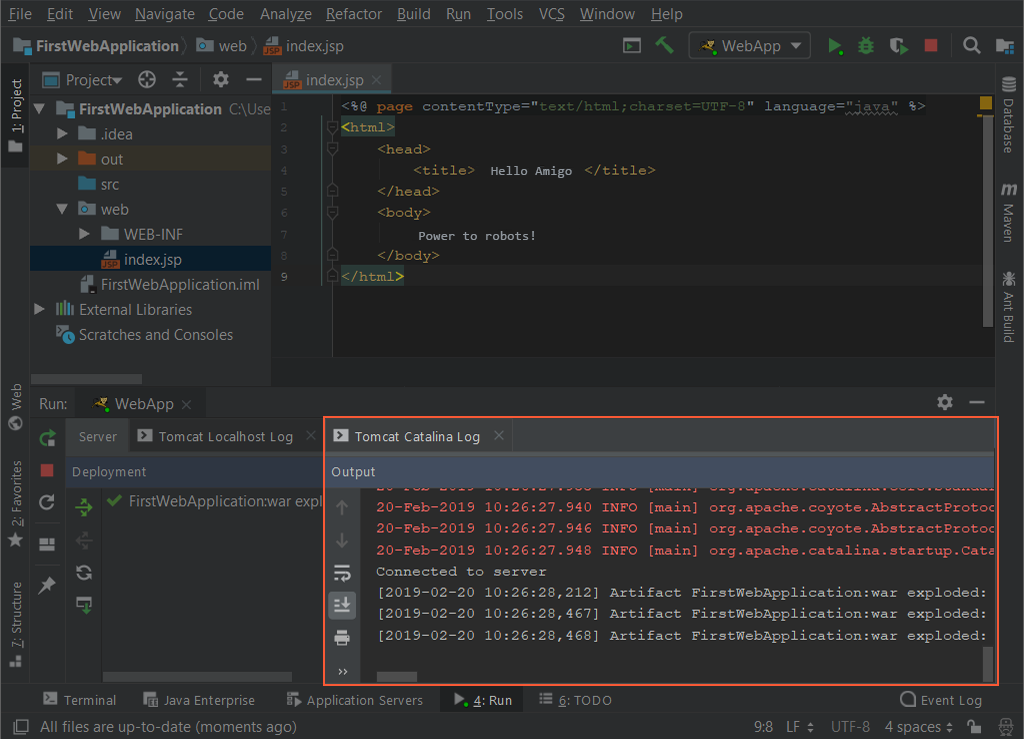
"The Tomcat log and stack trace should be visible. The log should have no errors."
"Something like this:"
Step 15 - Tomcat log
"At the same time, IDEA should open a browser with the URL to your servlet."
"You should get something like this:"
Step 16: Change index.jsp

"Yep. That's what I got. Cool!"
"And now enter the following URL in the browser:"
| http://localhost:8888/index.jsp |
"Nothing changed."
"Don't say that."
Step 17: Change index.jsp

"Now the browser displays the index.jsp file you saw in IntelliJ IDEA."
"The one I changed?"
"Yes."
"But if only the domain is specified in the browser's request, and not the rest of the request, then the default handler will be called. In our case, this is index.jsp."
"Suppose you have three files: index.jsp, apple.jsp, google.jsp. Here's how things will work:"
| Request | Response |
|---|---|
| http://localhost:8888 | index.jsp |
| http://localhost:8888/ | index.jsp |
| http://localhost:8888/index.jsp | index.jsp |
| http://localhost:8888/apple.jsp | apple.jsp |
| http://localhost:8888/samsung.jsp | Error message: Servlet not found |
| http://localhost:8888/google.jsp | google.jsp |
| http://localhost:8888/index | Error message: Servlet not found |
"I understand that."
"Bilaabo, you've been telling that JSPs are awesome for so long. But they're very similar to ordinary HTML pages. Everything's exactly the same."
"Well, not everything. Try adding the following text to the JSP:"
<%@ page contentType="text/html; charset=UTF-8" language="java" %>
<html>
<head>
<title>Amigo says hi</title>
</head>
<body>
<%--This is still HTML--%>
<%
// But I can write Java code here

String s = "Power to robots!";
for(int i=0; i<10; i++)
{
 out.println(s);
 out.println("<br>");
}

%>
<%--and this is HTML again--%>
</body>
</html>
"You can embed Java code inside a JSP page, and it will run!
"Java code in a JSP page is called a scriptlet and is enclosed in <% and %> tags"
"Whoa."
"OK. I'll go write a few JSP pages of my own."
"Thank you so much, Bilaabo."
"And thank you to you, my friend!"
GO TO FULL VERSION