11.1 Git Branches
Working with branches in Git — it's one of the key aspects of version control that lets you work on multiple lines of development in a single repository at the same time. Branching makes Git a powerful tool for collaboration, experimenting, and managing different versions of a project.

You can think of branches in git as folders that git uses to copy your project. You have your main project folder in your local repository — main, and git can create copies of this folder so you can experiment in them without messing up the main, stable code. These copy-folders are called branches — branches.
Branches are alternative versions of code. Say, you want to make some changes in a big project, run an experiment you're not entirely sure about. How would you do it without git?
You could copy the project into a new folder and try changing everything in there. If you like the result, you could copy it back into the main folder. If not, you just forget about it—or delete it entirely.
Or let’s take an example from real life. Say, writing a book:

- You’ve got your book draft (the main branch).
- You want to try a different ending (creating a new branch).
- You write the new ending in a separate document (working in the new branch).
- If the new ending is better, you replace the old one in the draft (merging branches).
- You delete the separate document with the new ending (deleting the branch).
11.2 Creating Branches
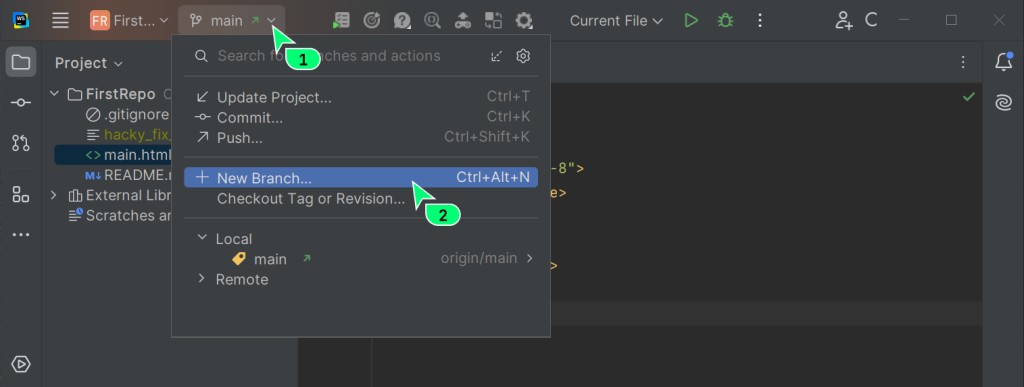
Creating a branch in WebStorm is super easy:
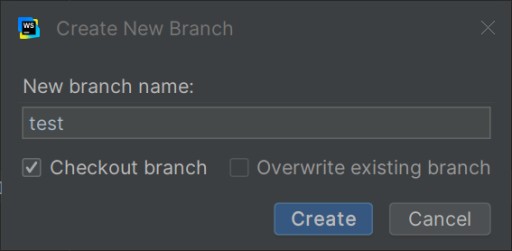
Enter the branch name:
WebStorm will immediately display the name of your current branch at the top of the menu:
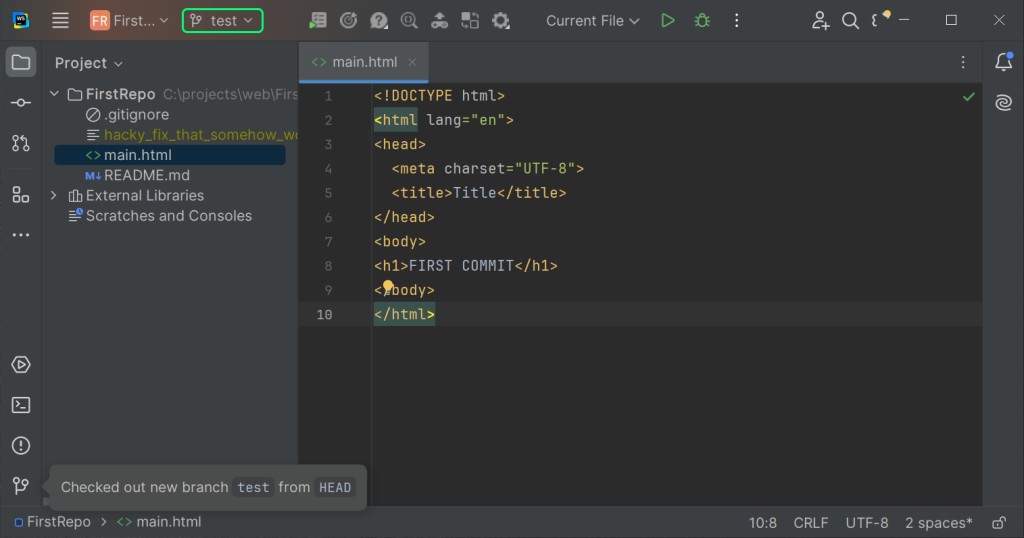
What was there before?
There was the name of your first and main branch — main.
Now it says test, which means Git (with WebStorm's help) not only created a new branch but also switched to it right away.
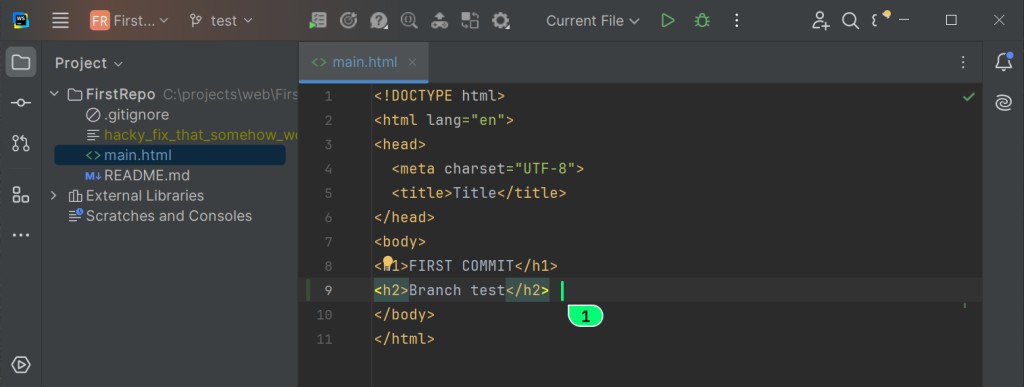
Let’s add some code to the main.html file in the current branch test and commit it:
11.3 Switching Between Branches
Step 1: Choose a branch.
Now let's switch to our old branch. Click on the top menu, and what do we see there?
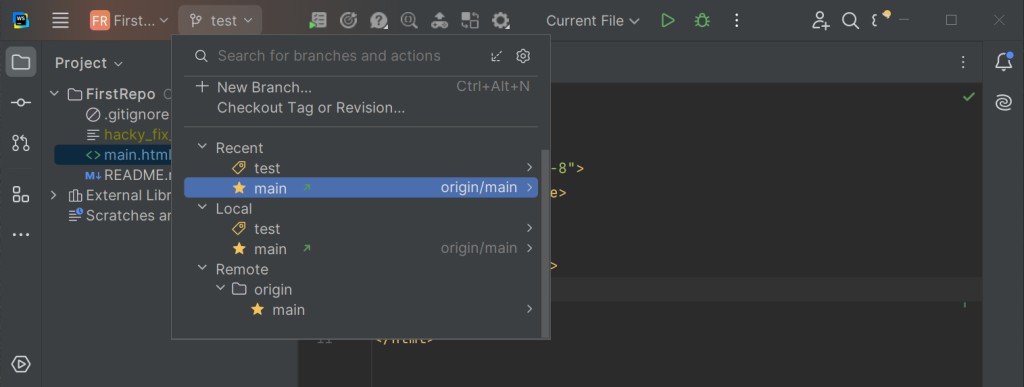
Don't freak out — it's all simple here:
Local — this is the list of branches in your local Git repository. There are two:
testmain
Remote — this is your remote repository, which is hosted on the GitHub server. We pushed your changes there, but the new branch isn't there, which makes sense. The remote repo is named origin, and it only has the main branch.
Recent — this is simply a list of the last branches you worked with: WebStorm adds this for convenience and speed.
The name origin/main next to the local repo name is the name of the remote repo it’s currently synced with, and where the changes will be pushed.
Step 2: Pull the branch code into the current folder.
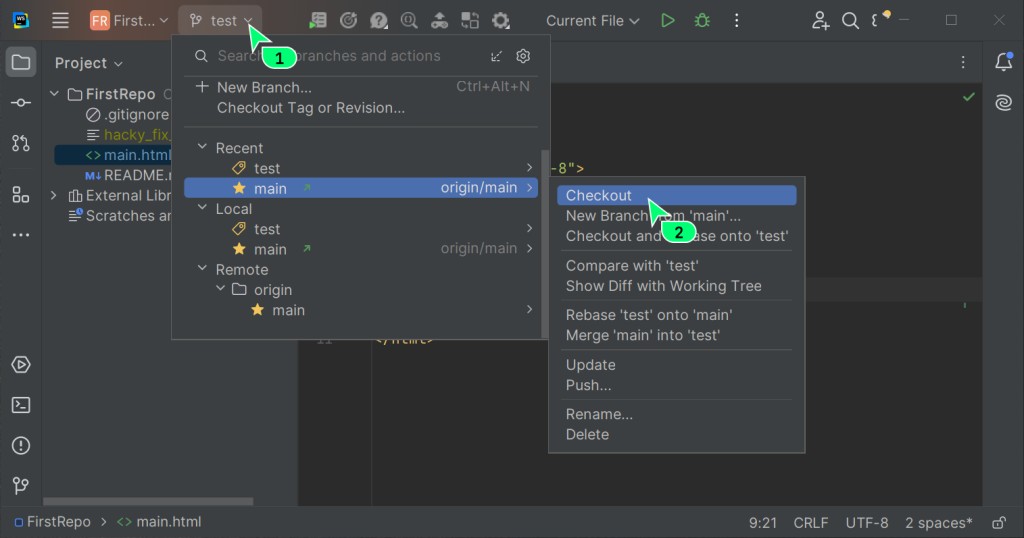
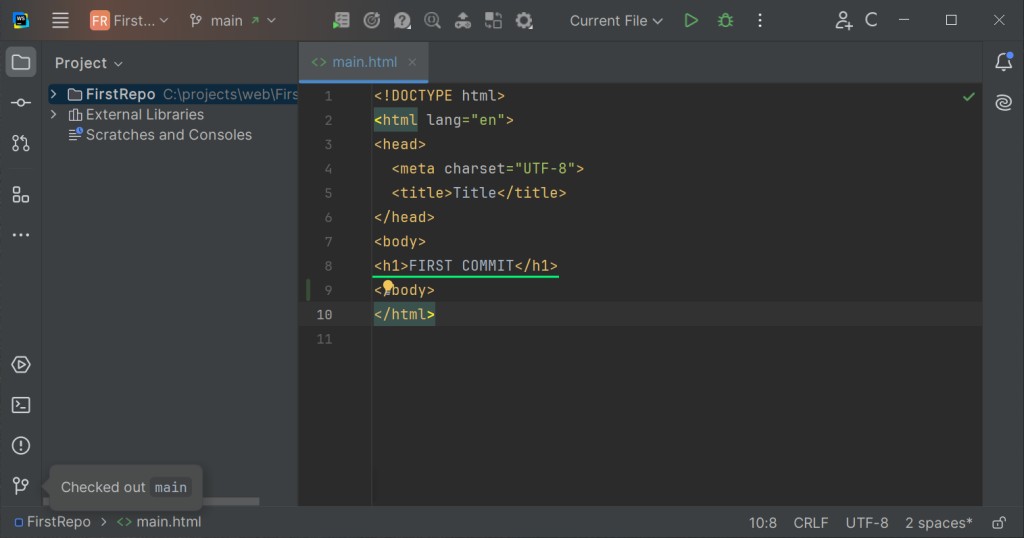
Step 3: Verify.
I see the main branch and the old code:
11.4 Merging Branches
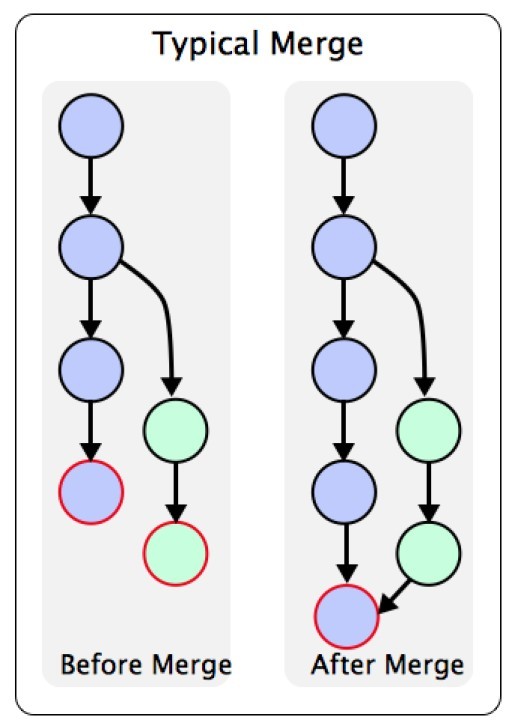
Alright, now let's try to merge the code from our two branches.
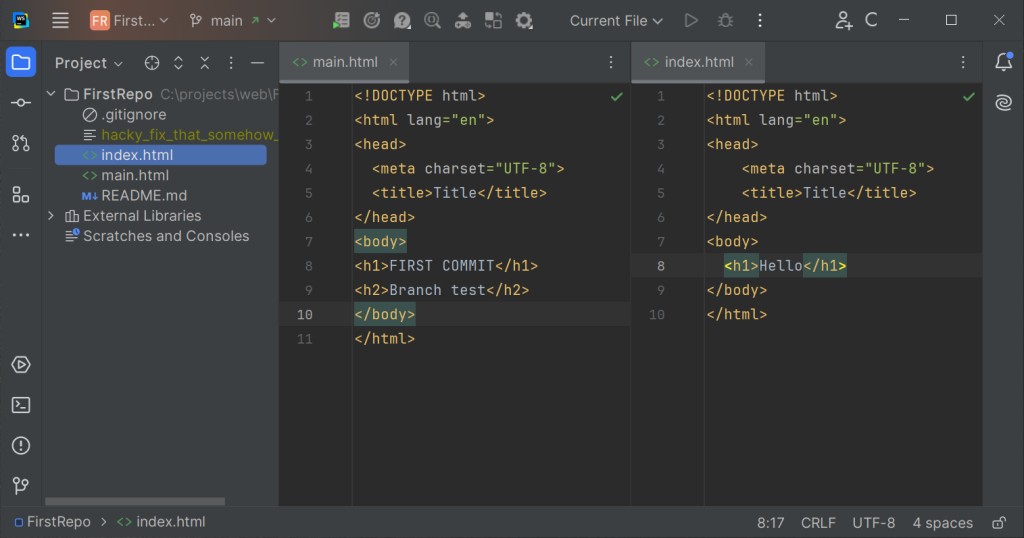
Step 1. First, let's add another file to our project — index.html and write some code in it:
- Create the
index.htmlfile - Write some code in it:
<h1>Hello</h1> - Commit the file
Here's what my two files look like in the main branch:
Step 2. Merging Branches.
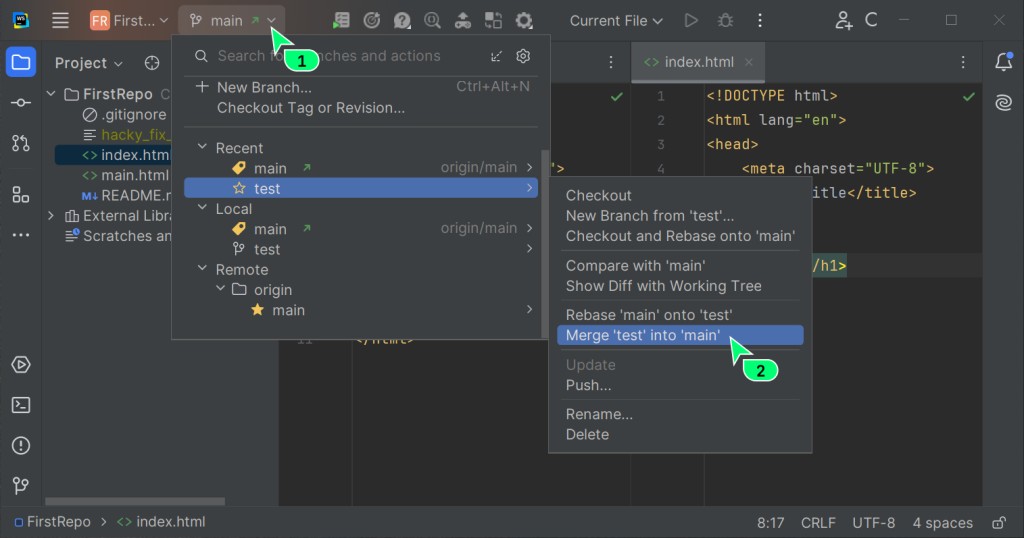
We'll merge the changes made in the test branch into our current main branch.
To do this, let's use the top menu and the Merge ‘test’ into ‘main’ command:
Step 3. Check the Result.
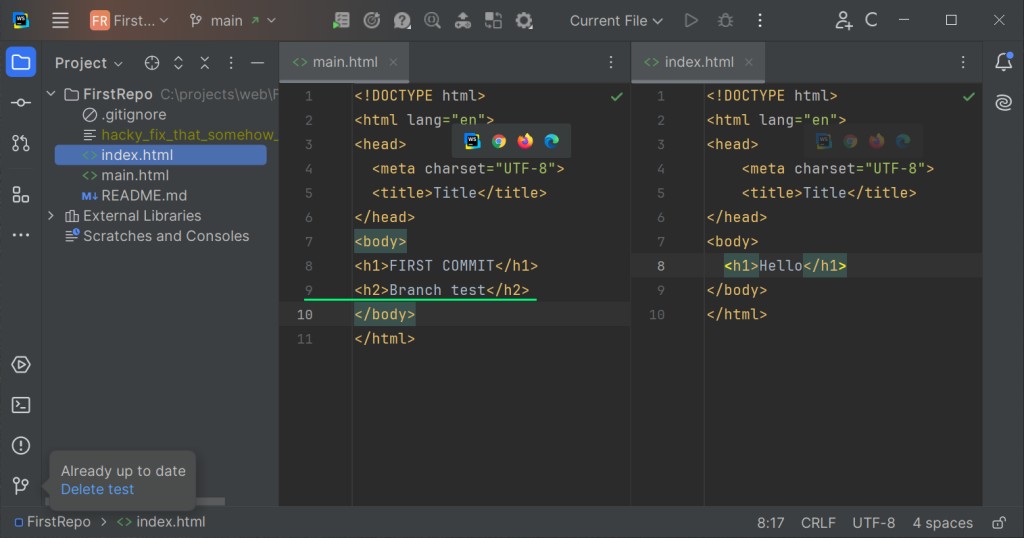
Let’s check:
- The branch
mainis still displayed at the top - We have 2 files:
index.htmlandmain.html - The file
main.htmlcontains code that was added in thetestbranch
11.5 Merge Conflicts
Sometimes, you might run into conflicts when merging branches.
If you make changes to the same file in different branches and then try to merge them, a conflict might occur.
Text File Conflict
Git is super smart — it understands file types. If you make changes in different parts of files that it considers text, it’ll just merge those changes into the right spots, like a human would.
Binary File Conflict
But if you tweak something like an image or a document, Git won’t try to mash those parts together. Instead, it’ll just ask you to pick which version of the file you want to keep in the current branch.
Manually Resolving Conflicts
If you make changes to the same place in a text file, Git won’t be able to merge those versions correctly and will ask you to fix it yourself:
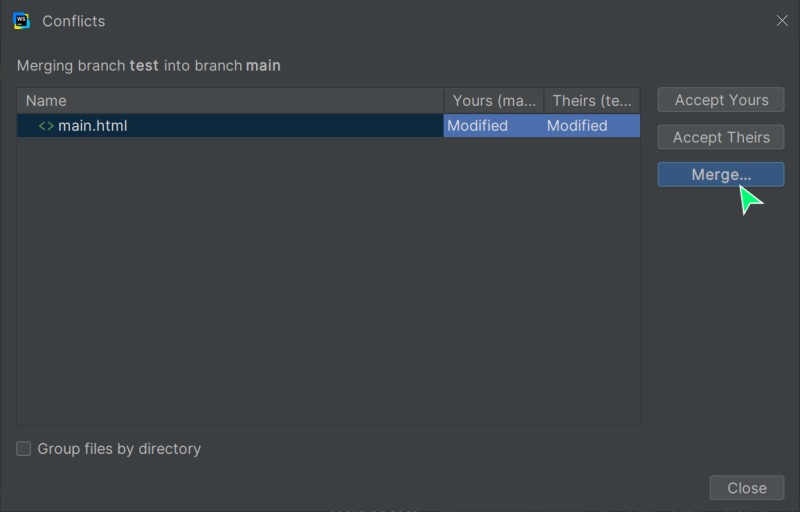
Here’s what that might look like:
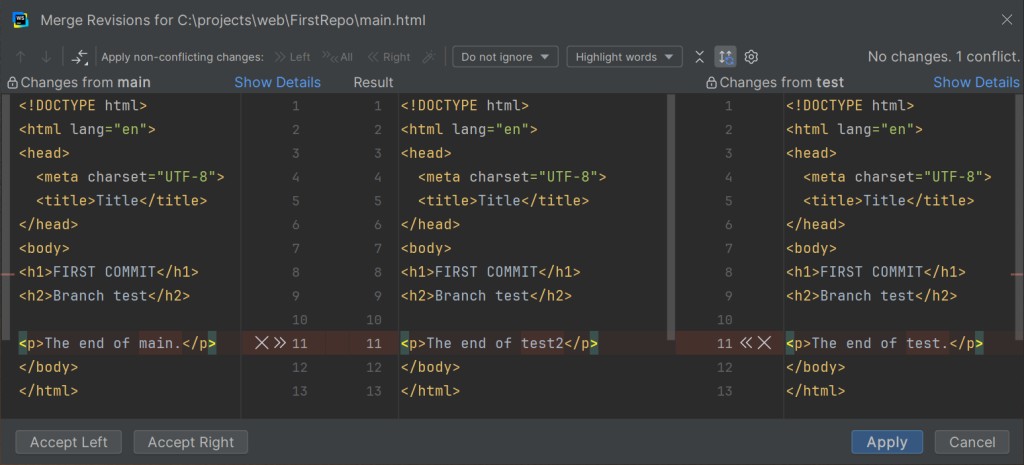
What you see here:
- On the left — the content of the
main.htmlfile from themainbranch - On the right — the content of the
main.htmlfile from thetestbranch - In the middle, WebStorm offers you to write the final version of the code (you can click the
>>and<<buttons to automatically insert changes from a file)
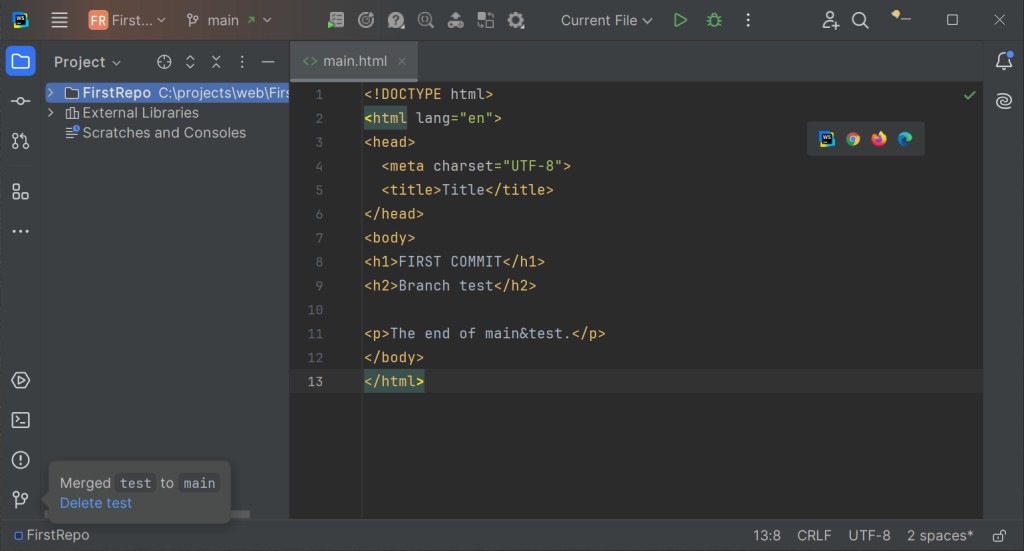
I accepted the master version and manually edited the code. Here’s what I ended up with:
11.6 Change History
Here's something cool and useful. You can check out the change history of any file by clicking the Show History button. There are two spots where you'll find it. Go ahead and locate them.
This is what the change history looks like for my file main.html:
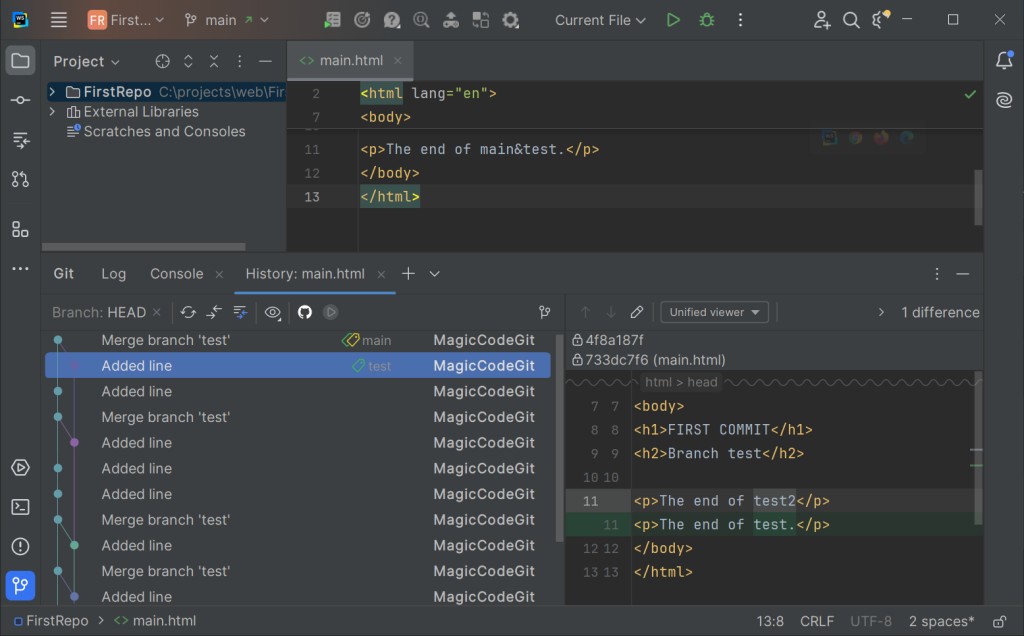
Explanations:
- On the left, you can see the change history of a specific file:
- The newer the change, the higher it appears; the older the change, the lower it is
- You'll also find the branch merge history here
- On the right — the changes made in a specific commit

GO TO FULL VERSION