1. How to write games on CodeGym
As you know, CodeGym has introduced a new feature: game writing. These tasks are substantially larger than normal tasks, and much more interesting. They are interesting not only to write, but also, um, to test. You understand what we're talking about ;) Work in the CodeGym offices literally ground to a halt for several days when we started the testing the game tasks :) Each game task is a project: a big task with twenty subtasks. When writing a game, you need to complete them in order. When the last subtask is done, your game is ready. It will use CodeGym's very simple game engine. Working with it is no more difficult than working with the console. You will find a description of the game engine and examples of how to use it in this document.
2. Game engine features
The playing field is divided into cells by the game engine. The minimum size is 3x3; the maximum is 100x100. Each cell can be painted a certain color and some text can be written in it. The text size and text color can also be set for each cell. The engine makes it possible to write event handlers for mouse clicks and key presses. Another interesting thing is the ability to work with a timer. Learn more in the "Working with a timer" section. Our "obvious" game engine lets you create very interesting games — something you'll see for yourself. Want to try? Then read the next paragraph and start writing games.3. Accessing a game
To start writing a game, go to the "Games" section on the CodeGym website, choose one you like, and go to its page. There will be a "Write solution" button — click it.
 The Web IDE will open. There you will start working on the first subtask of the game. What's more, the game's subtasks will be available to you in IntelliJ IDEA through the plugin.
If you're using IntelliJ IDEA, you'll need to update the plugin.
You can download the latest version of the plugin here.
After updating the plugin, open the task list, and select "Java Games Quest".
The Web IDE will open. There you will start working on the first subtask of the game. What's more, the game's subtasks will be available to you in IntelliJ IDEA through the plugin.
If you're using IntelliJ IDEA, you'll need to update the plugin.
You can download the latest version of the plugin here.
After updating the plugin, open the task list, and select "Java Games Quest".
 Next, click on the available subtask: a "Java Games" module should appear in your project, and it should contain the engine library and code for your subtasks. After that, it's just like solving any other task.
You can write games in Web IDE or in IntelliJ IDEA, whichever you like more. Still, IntelliJ IDEA is more convenient. And more professional. The choice is yours.
Next, click on the available subtask: a "Java Games" module should appear in your project, and it should contain the engine library and code for your subtasks. After that, it's just like solving any other task.
You can write games in Web IDE or in IntelliJ IDEA, whichever you like more. Still, IntelliJ IDEA is more convenient. And more professional. The choice is yours.
4. Publishing games to the application catalog
When you finish writing a game, you can publish it in the "Games and Applications" catalog on CodeGym. Simply press the "Publish" button, and in half a minute your game will be added to the "Published Games" section. If you want to share your implementation of the game with friends or colleagues, nothing could be easier. Just send them a link to the published game, and they can play. Registration on CodeGym is not required.
 As the creator, you can take pleasure in the number of times others play your game. Just like the number of views on YouTube. The bigger, the better.
5. Game customization
Once you've finished writing a game, you can modify it. Want to play 2048 on a 5x5 board? Go ahead. You're a programmer — and you've got a keyboard at your fingertips. Change the game however you like. You can add something entirely new. For example, in Snake, the snake could slow down if it eats a fresh apple (within 5 seconds after the apple appears). Moreover, the apple could change color from red to green, or become a pear. Or maybe your snake loves rabbits more than apples... In Minesweeper, you could give the player a second life or perhaps an atomic bomb that "lights up" cells within a radius of several cells. But remember, if you work with files or graphics in a game without using the game engine, the game may not be published in the application catalog. Not everything can be run in a browser, you know.6. Useful documentation
We prepared some in-depth documents to help you get acquainted with the CodeGym game engine (initializing the game, creating the playing field, and working with graphics), event handling (working with the mouse, keyboard, and timer), and refresh or learn the basic Java theory you'll find when writing games (first and second CodeGym quest):- "Games" section on CodeGym: Description of the game engine
- "Games" section on CodeGym: Event handling
- "Games" section on CodeGym: Useful theory
7. Common problems
I have Linux and I use OpenJDK. When I run the game, the compiler gives an error:
Error:(6, 8) java: cannot access javafx.application.Application
  class file for javafx.application.Application not found
At the command prompt, enter the following:
sudo apt-get install openjfxAfter that, go to the project settings (ALT+CTRL+SHIFT+S) -> SDKs -> Classpath and click on the plus sign on the right. Select the file jfxrt.jar. It is located in the installed JDK at: <JDK_PATH>/jre/lib/ext/jfxrt.jar
Click OK.

Download the JavaFX Windows SDK at https://gluonhq.com/products/javafx/.
Unpack the downloaded archive into any folder (preferably in the lib folder of the Games project).
Open IDEA.
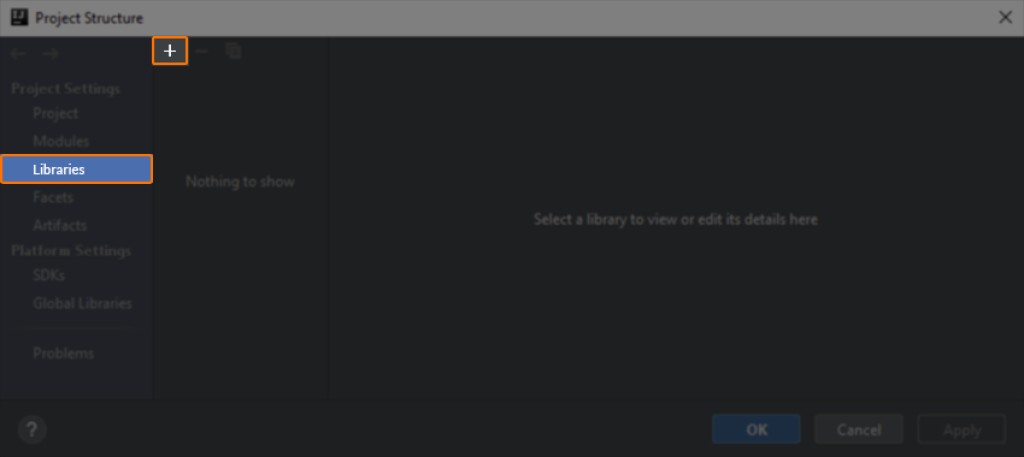
In IDEA, go to File -> Project Structure.
Select the Libraries tab and click + -> Java.
![New section on CodeGym — Games - 6]()
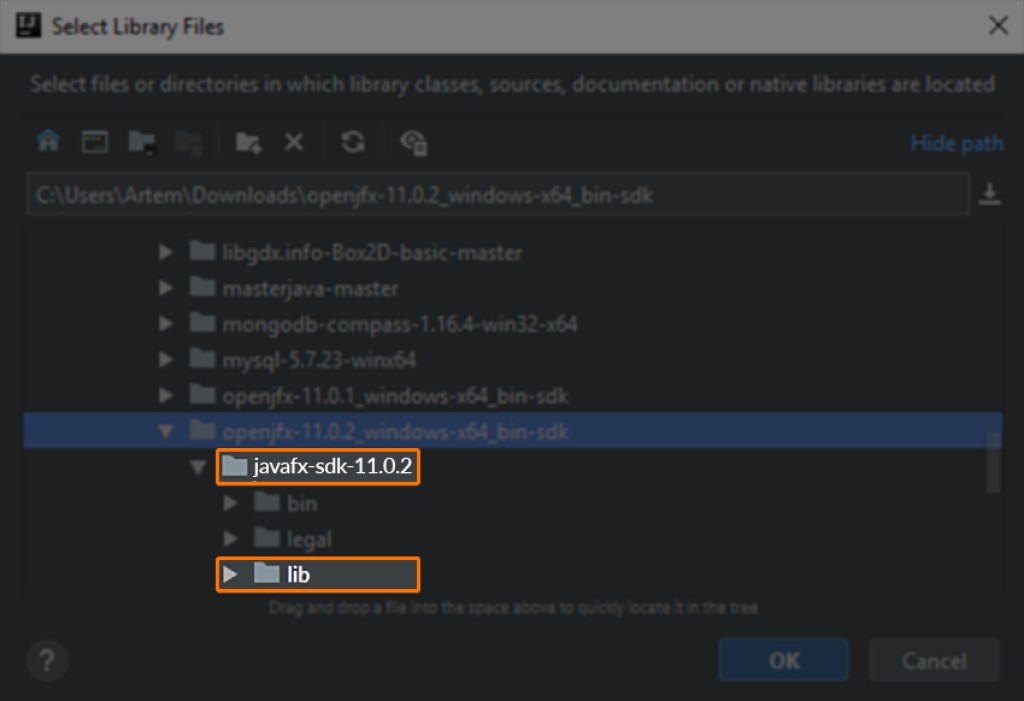
Specify the path to the unpacked javafx-sdk folder and select the lib folder
![New section on CodeGym — Games - 7]()
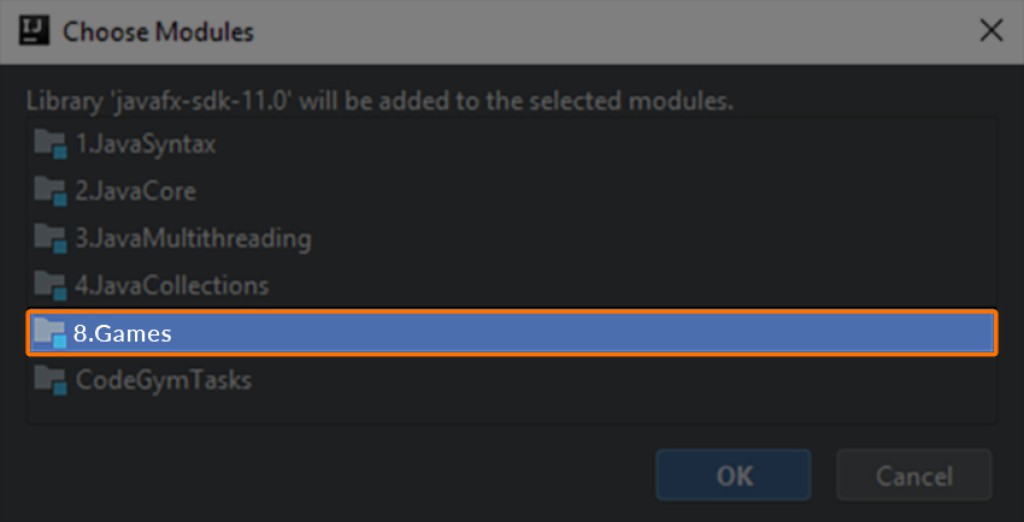
Click OK. Then in the new window, add JavaFX to the Games module.
![New section on CodeGym — Games - 8]()
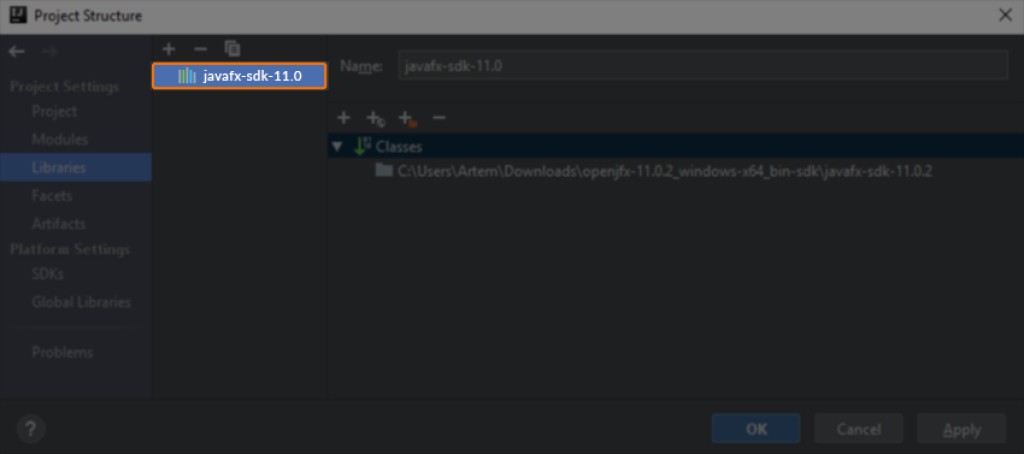
Now a new library should appear. Click Apply -> OK.
![New section on CodeGym — Games - 9]()
To run the game correctly, open Run-> Edit Configuration, and enter the following in the VM options field:
--module-path ./lib/javafx-sdk-16/lib --add-modules=javafx.controls,javafx.fxml,javafx.base![New section on CodeGym — Games - 10]()
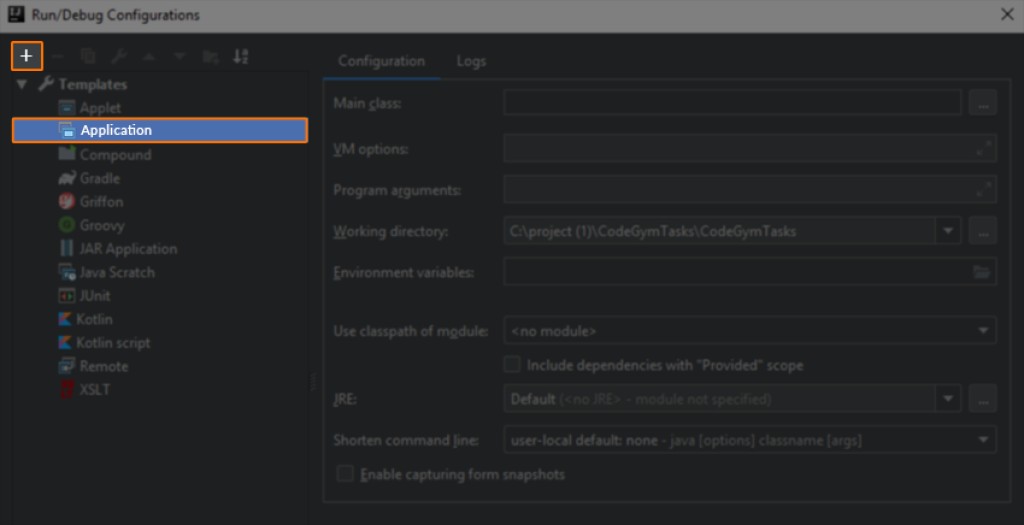
Next, you need to add the application on this tab. To do this, click + -> Application
![New section on CodeGym — Games - 11]()
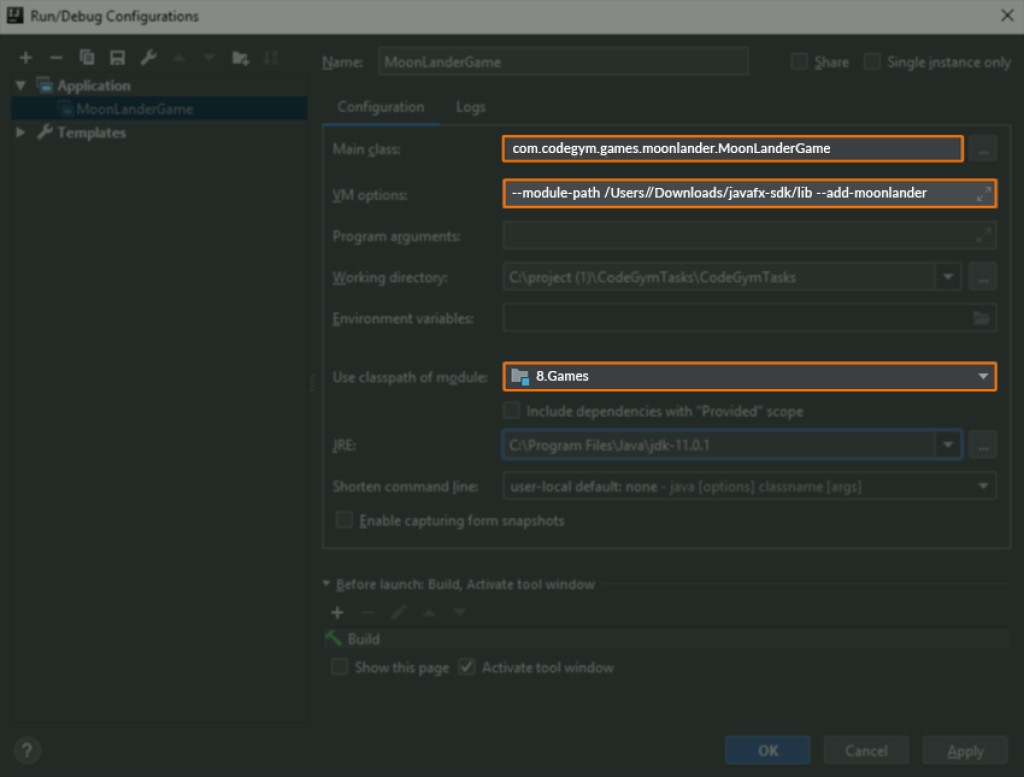
Select the Games module
Enter the path to the main class (in this case —
SnakeGame)Enter the same VM options as in item 9.
Click Apply -> OK
![New section on CodeGym — Games - 12]()
Run the game.

GO TO FULL VERSION